Dropdown Menus and Why They Matter
Dropdown menus are an integral part of website navigation, particularly for eCommerce sites like those powered by Shopify. They play a vital role in creating a seamless, user-friendly shopping experience and allow your online visitors to find what they’re looking for and fast. Here’s why dropdown menus matter and how they can positively impact your online store:
- Improved organization: With dropdown menus, you can organize your Shopify store’s collections and tags, making them easy to find and sort through.
- Saves on space: Dropdown menus make better use of space by condensing multiple menu items into one list. As your website grows – and you add even more products – you’ll need all the space you can get!
- Enhanced usability: A well-structured top navigation, complete with dropdown menus, reduces the number of clicks it takes a user to find what they are looking for.
- Decreased bounce rate: By incorporating dropdown menus, you can reduce your bounce rate. Customers are more likely to stay on your website if it’s easy to navigate.
- SEO benefits: Structuring solid navigational menus filled with appropriate keywords along with clear content hierarchy can help with search engine optimization.
How to Create a Dropdown Menu in Shopify
- Click on Navigation under Online Store once you’re logged into your Shopify account. This will show you any current navigation you already have in place.
- To create a new menu, click on Add Menu in the top right. If you’d rather add a dropdown menu to an existing menu, click on the menu you’d like to edit.
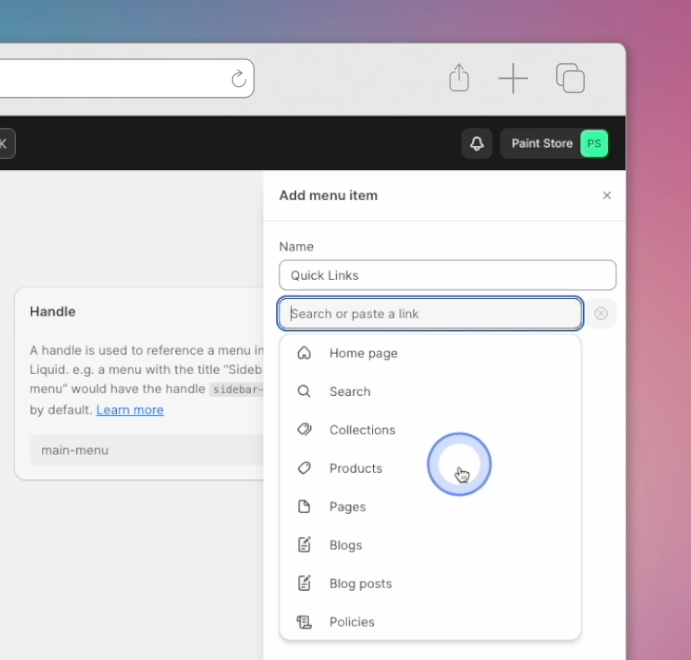
- Click on Add Menu Item and enter a Name for the top item found in your new dropdown menu.
- Next, choose the type of link you would like to attach to your menu item. By default, the options are: Home page, Search, Collections, Products, Pages, Blogs, Blog Posts and Policies. You can also use a custom link. If you don’t want to actually link anywhere, simply enter the number sign (aka hashtag symbol). This will make it so that only the menu items found below the top item are clickable.
- Once you have given your top menu item a name and chosen the appropriate link, click on the Add button in the bottom right corner.
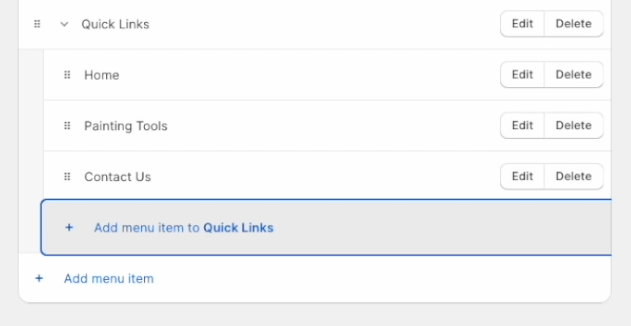
- To add the items found within your dropdown menu, click on Add Menu Item found under the menu item you just created.
- Give this new menu item a name and select the appropriate link. Hit Add.
- To place your latest menu item under your first menu item, drag and drop it into place. This is what turns it into a dropdown menu.
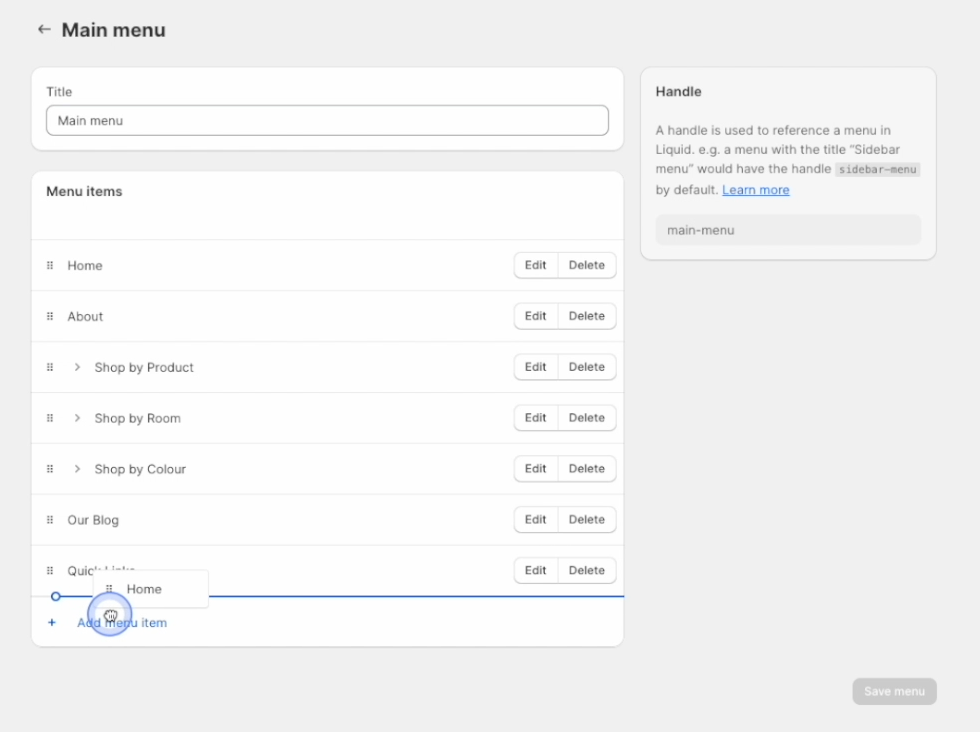
- You can now create as many additional menu items as you’d like by clicking on Add Menu Item. Don’t forget to hit Add every time you add another menu item.
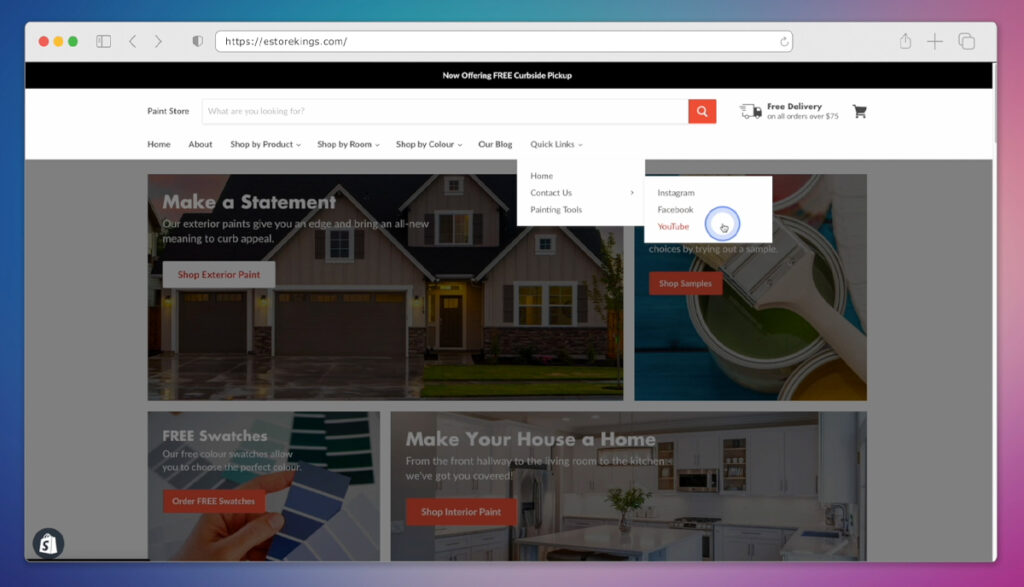
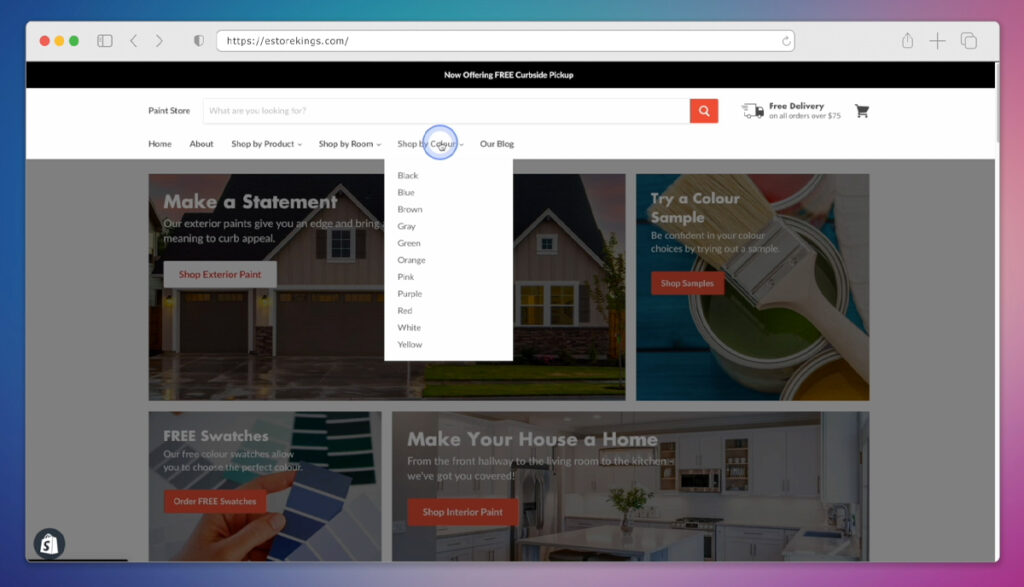
- You can also create a multi-level dropdown menu by creating additional menu items and dragging them underneath secondary menu items. This is what we did under Contact Us in the example below.
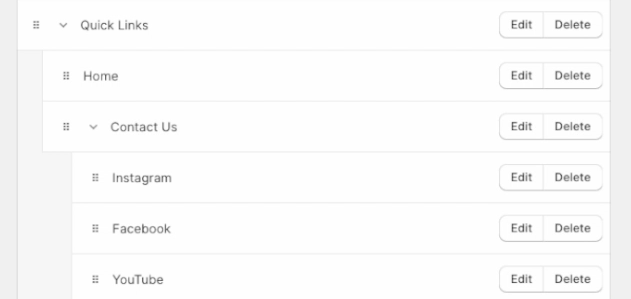
- When you’re all done adding menu items, click on the Save Menu button and you’re done! Have a look at the dropdown menu we created below and compare it to the screenshot above that was taken from our Shopify admin.