




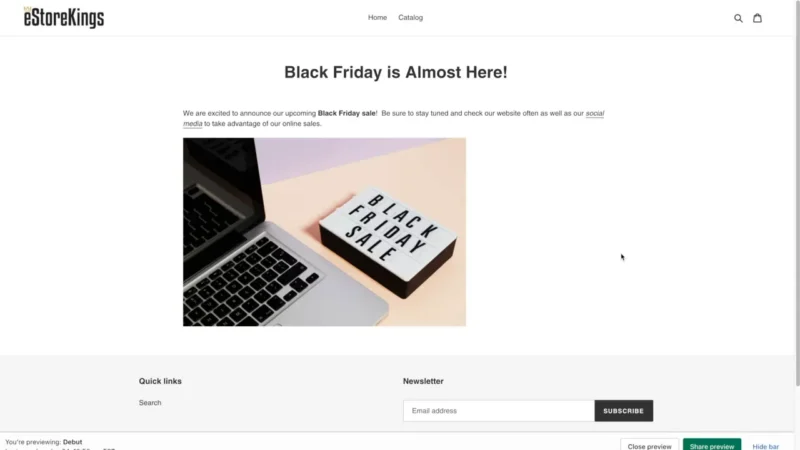
Quick Steps
- Go to Online Store > Pages and click Add page.
- Enter a Title and add your text, links, images and videos in the Content box.
- Choose Visible or Hidden and pick a Theme template.
- Edit the Search engine listing so your page looks good in Google.
- Click Save, then add the page to a menu under Content > Menus.
Why Pages Matter for Your Shopify Store
Pages are where you put the information that doesn’t change very often, like your About Us story, a Contact page, a size guide or a page announcing your next big sale. Every Shopify store needs a few of them, and they only take a couple of minutes to set up. Here are a few reasons why they’re worth getting right:
- Builds trust: An About Us page and clear contact details show shoppers there’s a real business behind your store.
- Answers questions before they’re asked: Shipping info, FAQs and size charts cut down on emails and help customers buy with confidence.
- Helps with SEO: Every page has its own title, meta description and URL, which gives search engines more ways to find your store.
- Supports your promotions: A dedicated page for a sale or launch gives you one link to share in emails and on social media.
- Keeps your store organized: Once a page is added to a menu, customers can find it from any page of your store.
How to Create and Edit Pages in Shopify
Everything below is done right in your Shopify admin, no code required. The video above was recorded in 2021, so your admin will look a little different. The steps are written for today’s admin, and we point out where things have moved.
Step 1: Go to the Pages Section
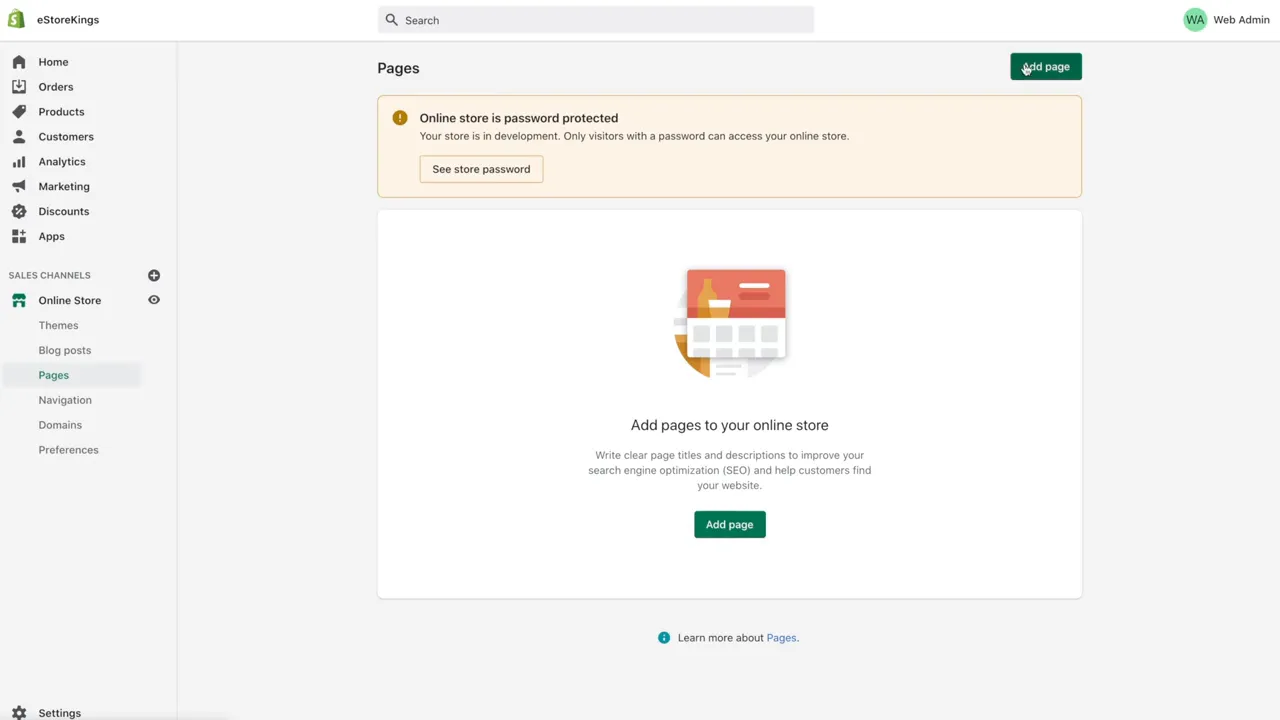
Once logged into your Shopify admin, click on Online Store in the left menu and then click on Pages. This is where all of your store’s pages live. Click the Add page button to start a new one.
Step 2: Add a Title and Content
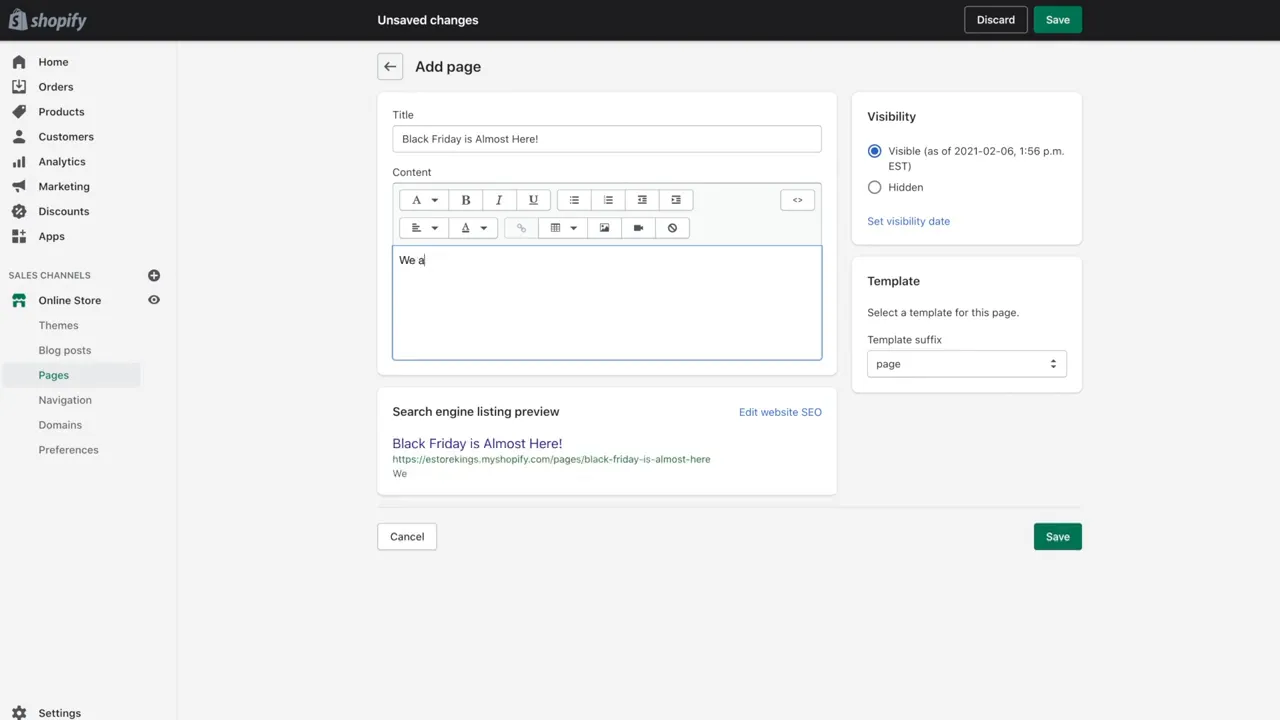
- Enter a Title for your page. Be clear and descriptive, because your page title shows up in the browser tab and in search engine results.
- Click into the Content box and start typing. This is where you’ll add your text, links, images, videos and tables.
- Short on ideas? You can click the Sidekick icon in the Title field or in the content editor, describe what the page is about, and Shopify will suggest some text for you. Just be sure to edit it so it sounds like your brand.
Step 3: Format Your Text and Add Links
The content editor works a lot like a word processor. Highlight some text and use the toolbar to make it bold or italic, or use the shortcuts you already know (Command or Ctrl plus B or I). To turn a line into a heading, select it and choose a heading style from the formatting menu.
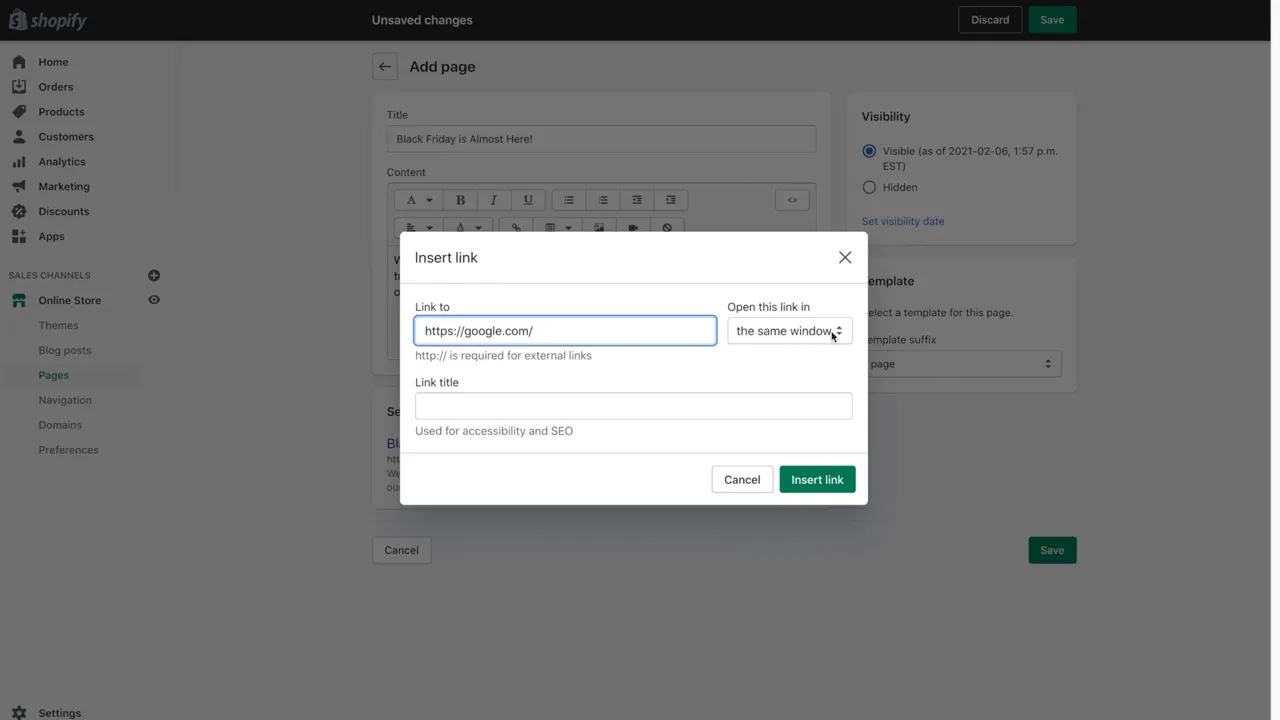
To add a link, highlight the text you want to link and click the Insert link button. Enter the web address in the Link to field and add a short Link title, which helps with accessibility and SEO. Then click Insert link.
Step 4: Add Images
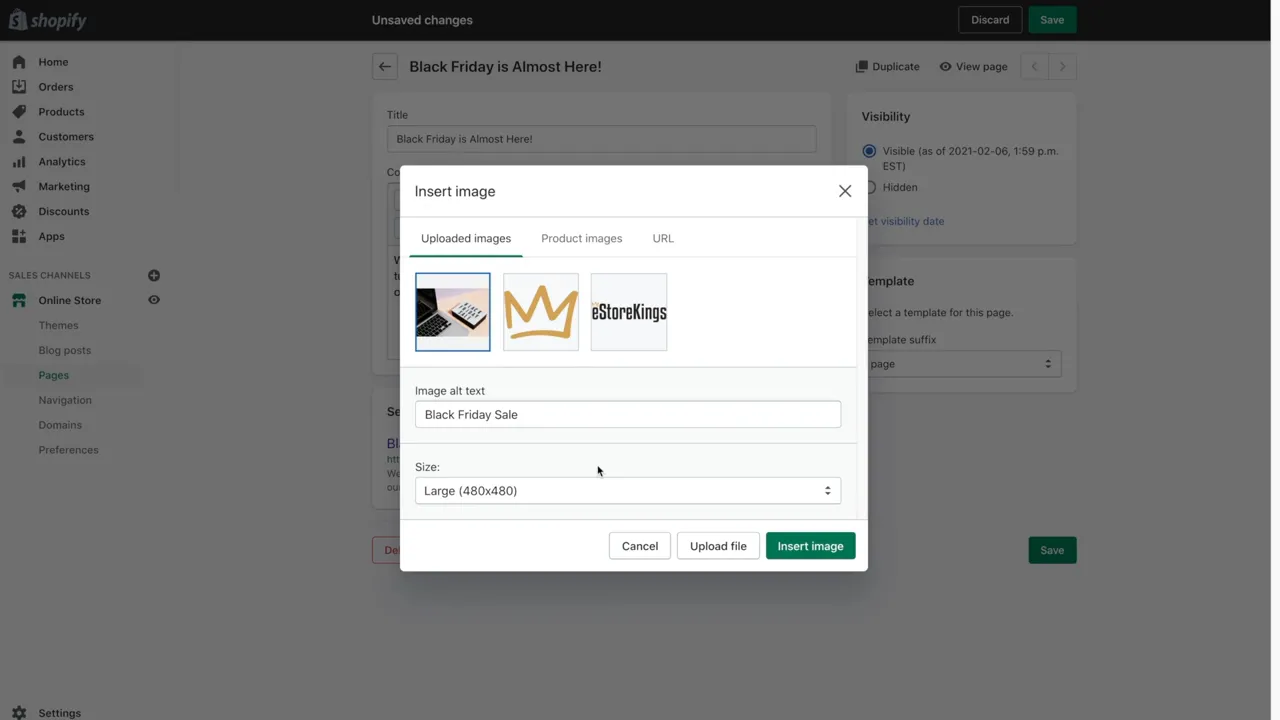
- Click where you’d like the image to go, then click the Insert image button in the toolbar.
- Choose an image from the Uploaded images tab, pick one from Product images, use the URL tab for an image that’s already online, or click Upload file to add a new one.
- Add Image alt text that describes the image. Alt text makes your store more accessible and helps search engines understand your images.
- Choose a display Size and click Insert image. Picking a smaller size doesn’t change the original file, so you can reuse the same image elsewhere at a different size.
- To center the image, click on it and use the alignment buttons in the toolbar.
Step 5: Add a Video, Lists or a Table
You can embed a YouTube or Vimeo video on any page. On YouTube, click Share under the video, then Embed, and copy the code. Back in Shopify, click the Insert video button in the content editor and paste the embed code. If you prefer, you can also click the Show HTML button (the < > icon), paste the code where you want the video to appear and click Show editor to switch back. Don’t paste embed code straight into the regular editor, or it will just show up as text on your page.
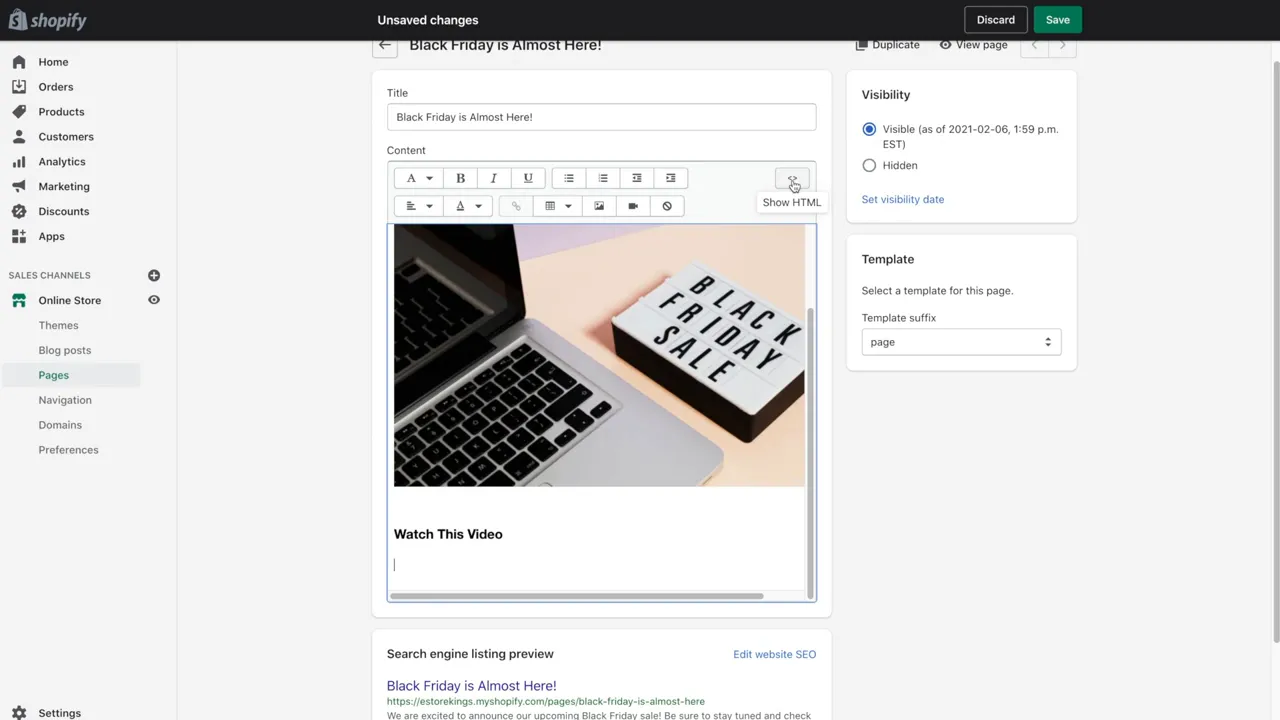
The toolbar also has buttons for bulleted and numbered lists, plus an Insert table button for things like a simple price list. Keep tables short and simple so they still read well on a phone.
Step 6: Choose the Visibility and Save
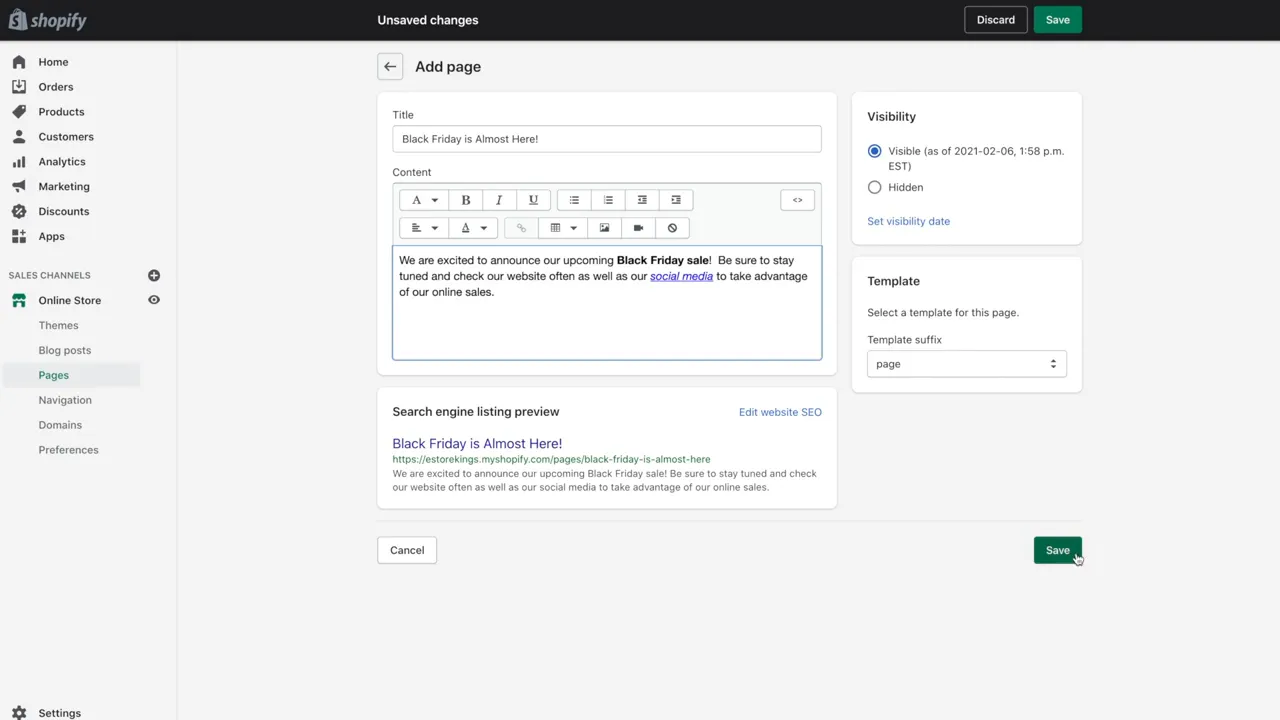
- In the Visibility section, keep Visible selected if you want the page to go live as soon as you save it.
- Select Hidden if you’re not ready to share it yet. You can also click the calendar icon to choose a date and time for a hidden page to be published, which is handy for sale announcements.
- Click Save. Once your page is saved, you can preview it on your store. You might need to refresh your browser to see your latest changes.
Step 7: Pick a Theme Template
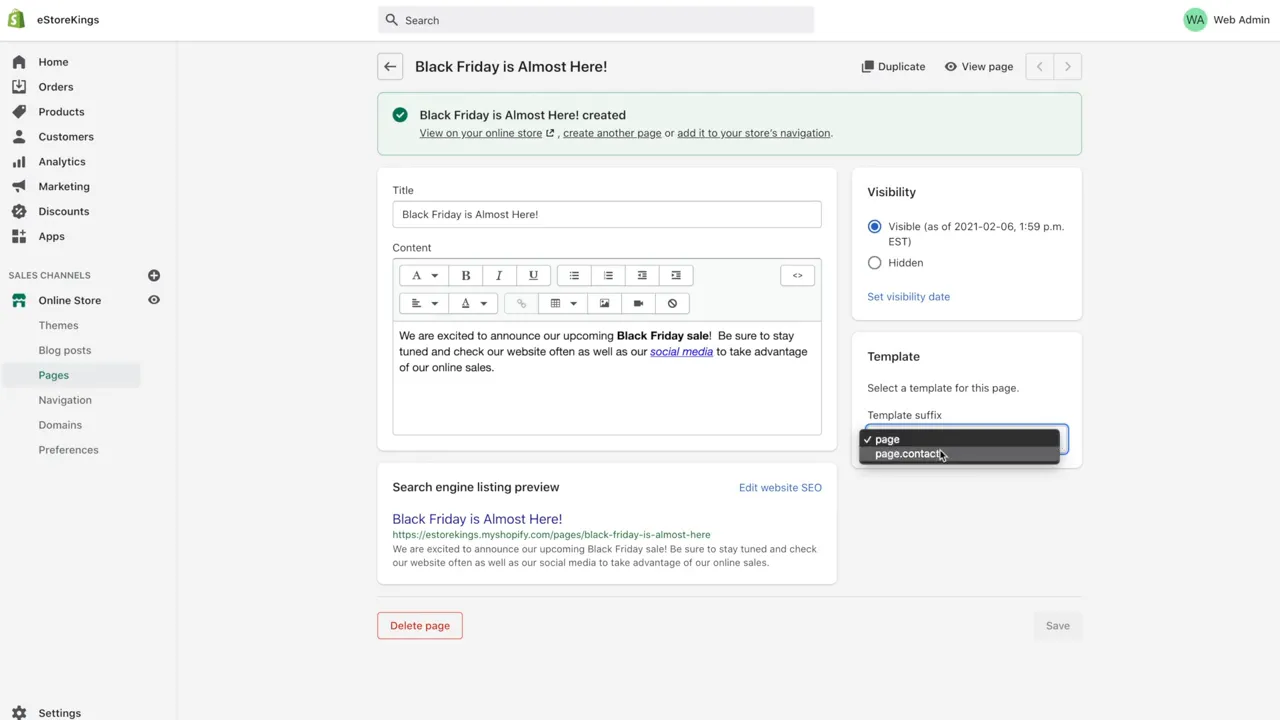
Every theme comes with a default page template, and many include extras like a contact page template with a built in contact form. To change the layout, find the Online store section on the page and choose an option from the Theme template menu, then click Save. Want a layout your theme doesn’t have yet? In the theme editor you can create a new page template from an existing one and add sections to it, all without code.
Step 8: Edit the Search Engine Listing
- Scroll down to the Search engine listing section and click the pencil icon.
- Enter a Page title and Meta description. Try to keep the title under 70 characters and the description under 160 so they don’t get cut off in search results. The preview shows you roughly how your page will look in Google.
- Only change the URL handle if you really need to. Use hyphens between words instead of spaces. If you change it on a page that’s already live, leave the Create a URL redirect option checked so old links keep working.
- Click Save.
Step 9: Add Your Page to a Menu
New pages don’t show up in your store’s navigation on their own, so customers won’t find them until you add a link.
- From your Shopify admin, go to Content > Menus.
- Click the menu you want to add the page to, such as Main menu or Footer menu.
- Click Add menu item and enter a Name. This is the text customers will see in the menu.
- Click the link field, choose Pages and select your new page. Selecting it from the list, instead of pasting its URL, helps avoid broken links later on.
- Click Add, then Save.
Want your page tucked under another menu item? Learn how to create a dropdown menu in Shopify.
Step 10: Edit or Delete a Page
- To edit a page, go to Online Store > Pages, click the title of the page, make your changes and click Save.
- To delete a page, open it and click Delete page, then Delete to confirm. Keep in mind that deleting a page also removes any menu items that link to it.
- To hide or show several pages at once, check the boxes next to them on the Pages list and click Set as hidden or Set as visible.
What’s Changed Since the Video
The video was recorded in early 2021. Creating a page works the same way, but a few things in the admin have moved or been renamed:
- Navigation is now Menus: Menus have moved from Online Store > Navigation to Content > Menus.
- Template suffix is now Theme template: You’ll find the template menu in the Online store section of the page, and newer themes let you build extra page templates in the theme editor.
- A new Insert video button: You can paste a video embed code with the Insert video button instead of switching to the HTML view.
- The SEO preview has a pencil icon: Click it to edit the page title, meta description and URL handle.
- Scheduling uses a calendar icon: The old Set visibility date link is now a calendar icon under Hidden.
- Sidekick can draft your content: Shopify’s AI assistant can suggest a title and page text for you.
In the video we also built a two column layout with a table and removed its border in the HTML view. That still works, but it means editing code. A page template with an image and text section in your theme is an easier way to get the same look today.
Frequently Asked Questions
Shopify doesn’t add new pages to your navigation automatically. Go to Content > Menus, open the menu you want, click Add menu item, choose Pages and select your page, then save the menu. Also check that the page is set to Visible.
Open the page under Online Store > Pages, select Hidden in the Visibility section and click Save. The page stays in your admin so you can make it visible again any time, or choose a date for it to be published.
Yes. Copy the embed code from the Share > Embed option on YouTube, then click the Insert video button in the content editor and paste it. You can also paste the code in the Show HTML view.
Open the page, click the pencil icon in the Search engine listing section and edit the URL handle. If the page is already live, keep the Create a URL redirect option checked so visitors using the old link still reach your page.
Any menu items that link to the deleted page are removed too. If you only want to take the page down for a while, set it to Hidden instead.
For more tutorials, visit our Shopify Tutorials page or subscribe to our YouTube channel. You can also signup for our email newsletter below for free resources and the latest tutorials!