




Quick Steps
- Go to Plugins > Add New and search for Antispam Bee.
- Click Install Now, then Activate.
- Open the plugin settings and choose the options you want.
- Click Save Changes.
- Clean up your old spam comments.
Why Get Spam Comments Under Control
If spam comments are piling up on your WordPress website, there’s a relatively easy way to get things under control. In the video, the site has almost 300 comments, and most of them are spam. A plugin called Antispam Bee does the job once it’s installed and activated.
- Easy to use: You really just have to install it and activate it.
- A quieter inbox: In the video, the spam comment emails stop coming in almost as soon as the plugin is active.
- Extra controls: You can block or allow comments from specific countries, or only allow comments in a certain language.
- Less cleanup: You can have existing spam deleted automatically after a set number of days.
How to Stop Spam Comments with Antispam Bee
The video was recorded in 2021, so your WordPress admin may look a little different.
Step 1: Find the Plugin
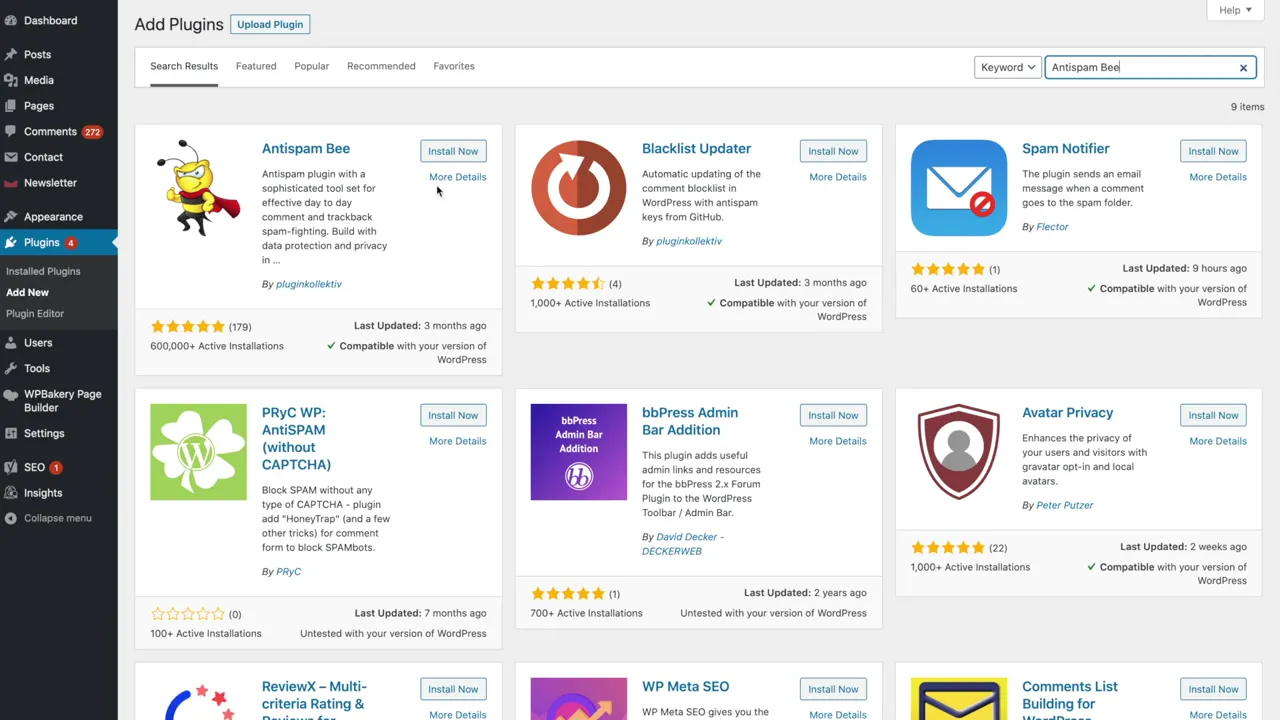
In your WordPress admin, go to Plugins and click on Add New. Search for Antispam Bee.
Step 2: Install and Activate It
Click the Install Now button, then click Activate. DigitalGrl’s tip: a plugin that is used by a lot of people is more likely to be updated and kept up properly.
Step 3: Choose Your Settings
Open the plugin’s settings and have a look through the options:
- Extra features: Block or allow comments from specific countries, or allow comments only in a certain language.
- Delete existing spam after a set number of days: Check this one off and the plugin deletes old spam for you automatically.
- Email notifications: You can get an email every time there is spam, but that could get annoying, so you may want to leave it off.
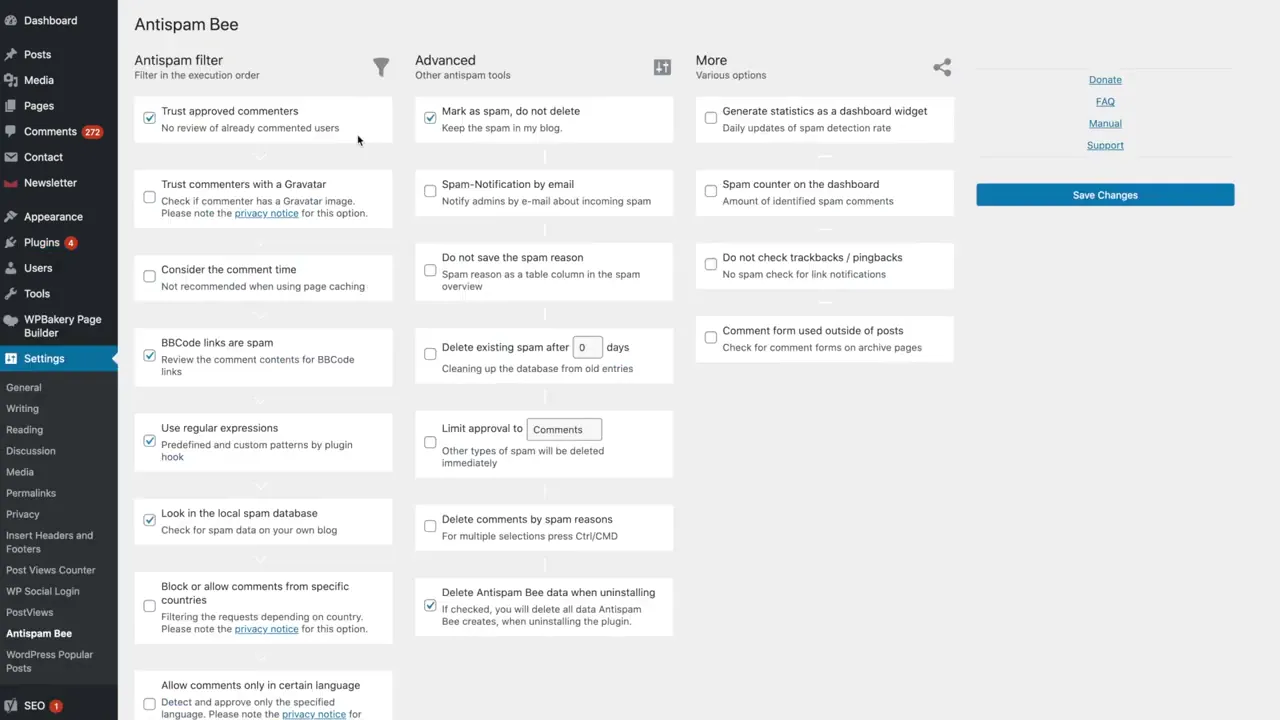
Check or uncheck the boxes you want, then click Save Changes.
Step 4: Clean Up Your Old Spam
That’s really it. You should start to see a decrease in the amount of spam comments on your website. You’ll still want to go through and clean up the old spam comments that came in before you installed the plugin.
Want more ways to keep your site running smoothly? Browse our WordPress Tutorials.
Frequently Asked Questions
Antispam Bee. Install it from Plugins > Add New, activate it and review its settings.
Yes. In the settings, check the option to delete existing spam after a set number of days.
Only if you turn on email notifications in the plugin settings. You can leave them off.
For more tutorials, visit our WordPress Tutorials page or subscribe to our YouTube channel. You can also signup for our email newsletter below for free resources and the latest tutorials!