




Quick Steps
- Go to Appearance > Themes and click Add New.
- Click Upload Theme, then Choose File and select your zip file.
- Click Install Now, then Activate.
- Install and activate the plugins your theme requires.
- Refresh your website to see your new theme.
Why Install a New WordPress Theme
Chances are the theme that comes with your WordPress install is not the theme you’re going to stick with. If you’ve bought or downloaded a theme from another website, it usually comes as a zip file, and you can upload it straight from your WordPress dashboard.
- Use the theme you picked: Swap the default theme for the one you bought or downloaded.
- No extra tools needed: The whole upload happens inside your WordPress admin.
- Plugins in one place: If your theme needs plugins, it can ask you to install them right after you activate it.
How to Install a WordPress Theme Using a Zip File
The video was recorded in 2021, so your WordPress admin may look a little different.
Step 1: Go to Add New Theme
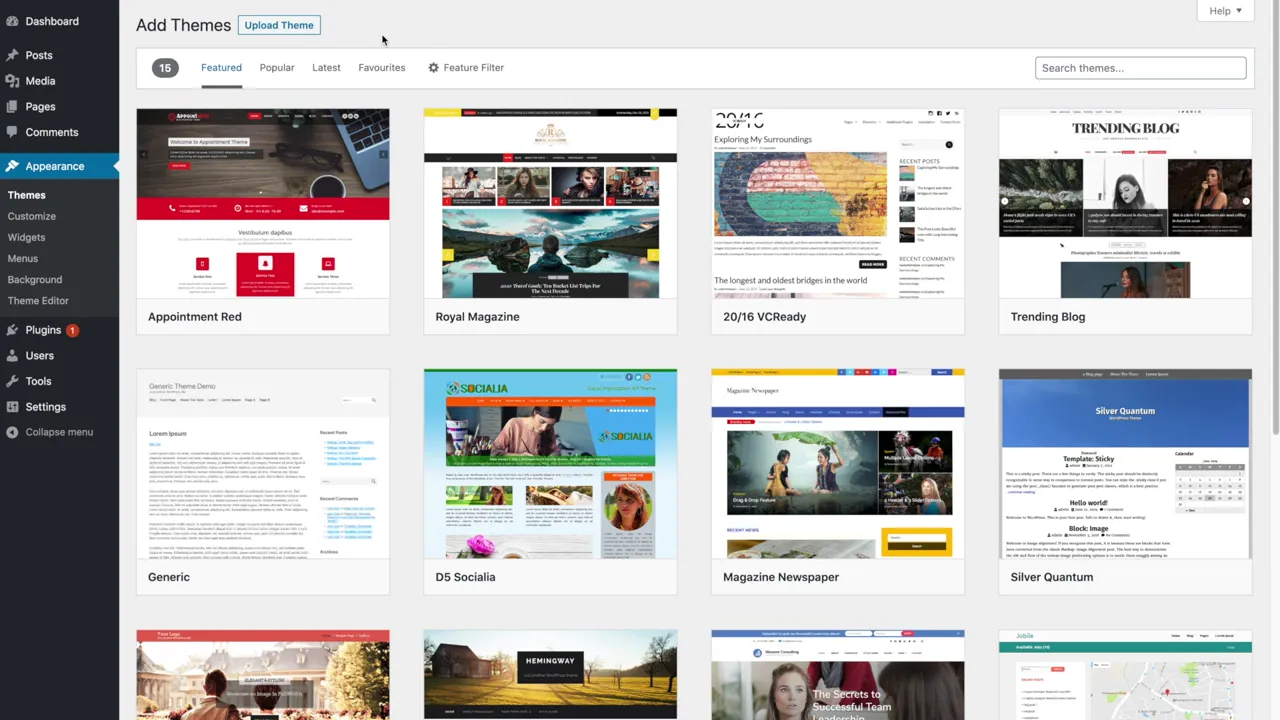
From your WordPress dashboard, head over to Appearance and click on Themes. You’ll see the default theme that was installed. Click Add New.
From here you can browse, search and filter other WordPress themes. Since your theme is a zip file, you’ll upload it instead.
Step 2: Upload Your Zip File
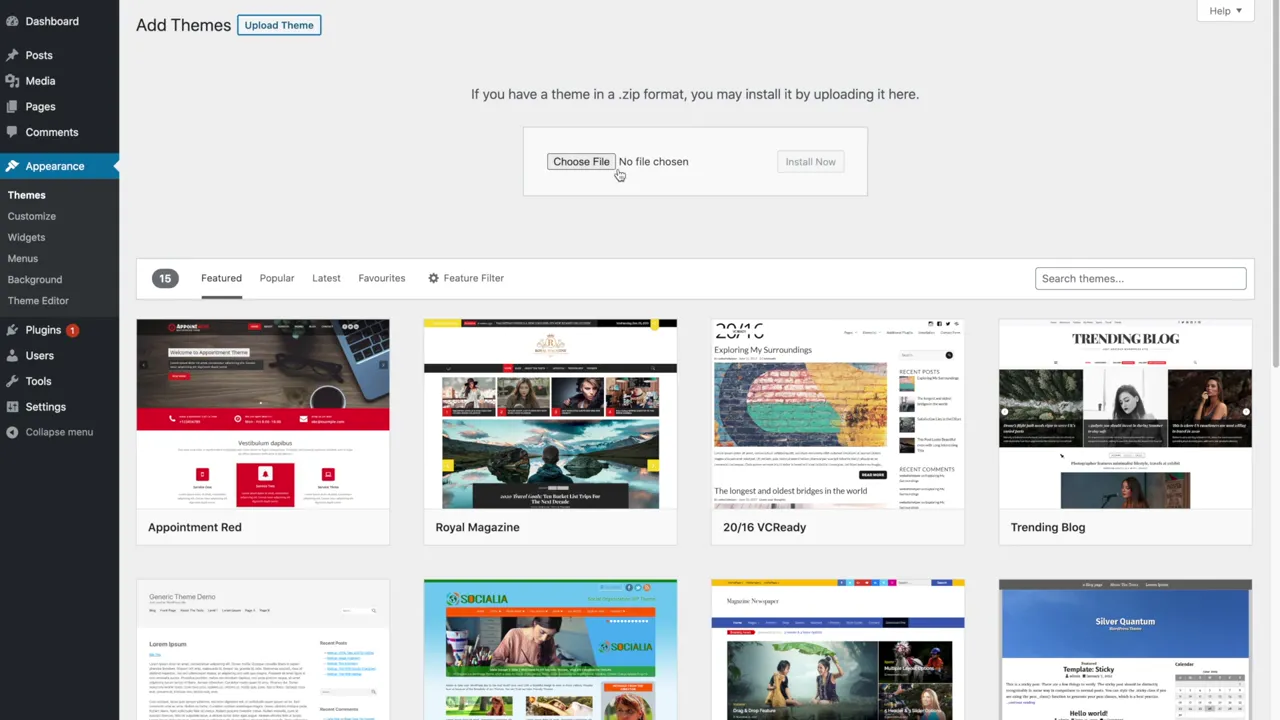
Click the Upload Theme button at the top of the page. Click Choose File, select your theme’s zip file, then click Install Now.
Step 3: Activate the Theme
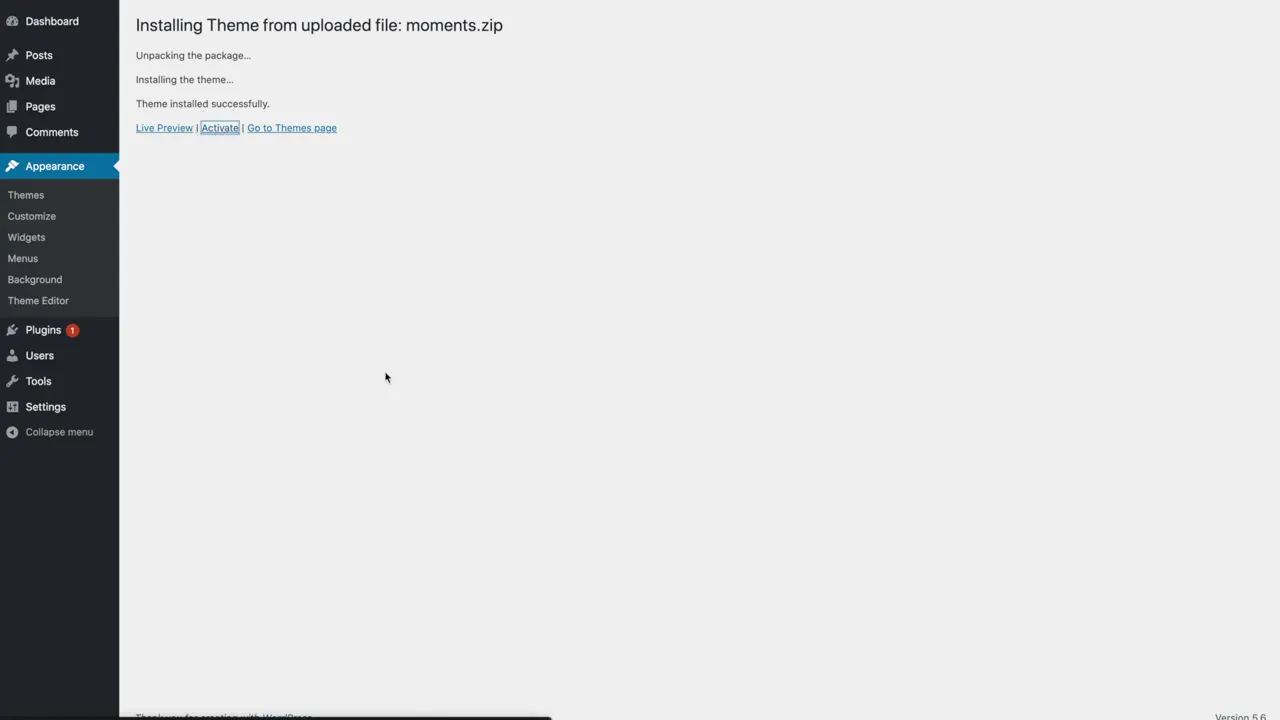
Once the zip file has uploaded and the theme is installed, click Activate.
Step 4: Install the Required Plugins
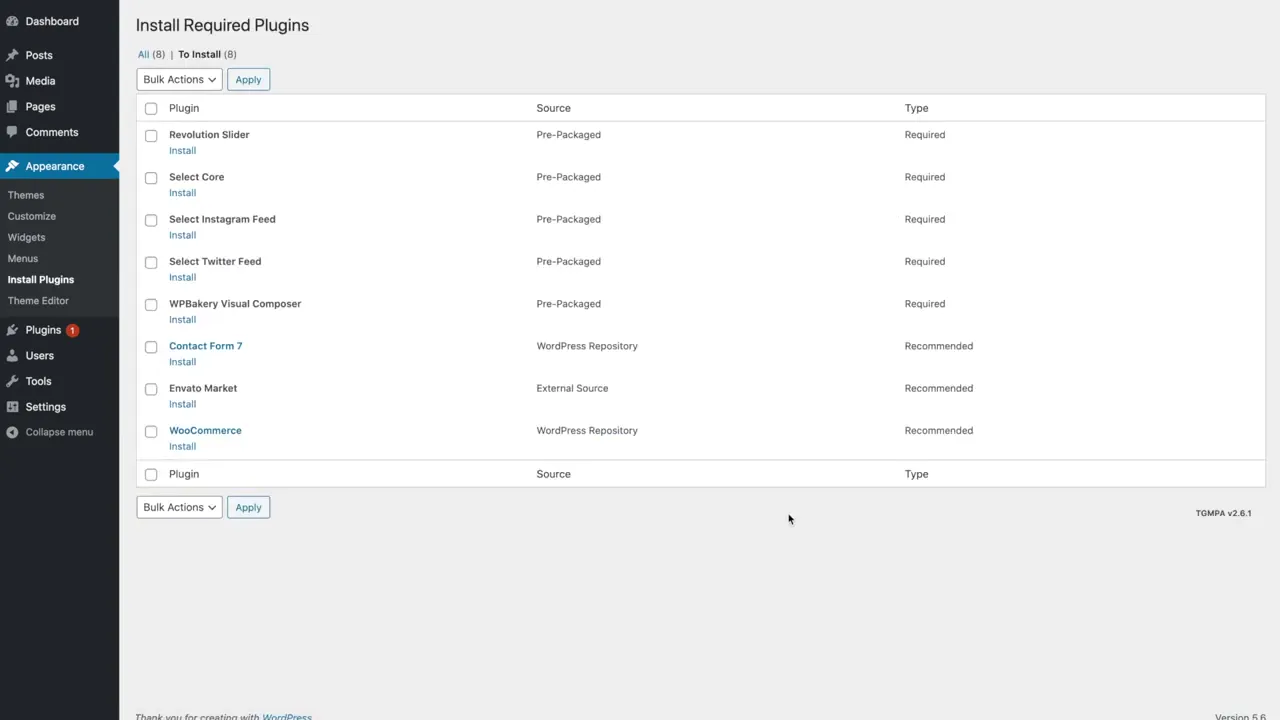
After you activate it, your theme may ask you to install the plugins that came with it. Your screen might look a little different, but you should be brought to an Install Required Plugins page. Your new theme needs these plugins to work properly, so install all of them.
You could select them all and install them in one go. DigitalGrl’s tip: in the past, she has had things not install properly when doing them all in one shot, so to play it safe, she installs them a few at a time. It may not be necessary, but it’s a good habit.
Step 5: Activate the Plugins
Return to the required plugins page. The plugins you installed will show as installed but not activated yet. Once they’re all installed, activate them all.
Step 6: Check Your Website
Head back to your website and refresh the page. You should see your new theme. And there you have it, your new WordPress theme is installed using the zip file you bought or downloaded!
Ready for the next step? Browse our WordPress Tutorials for more ways to set up your site.
Frequently Asked Questions
Go to Appearance > Themes, click Add New, then click Upload Theme and choose your zip file.
Your theme may come with plugins it needs to work properly. Install and activate them from the Install Required Plugins page.
You can, but to play it safe, DigitalGrl installs them a few at a time.
For more tutorials, visit our WordPress Tutorials page or subscribe to our YouTube channel. You can also signup for our email newsletter below for free resources and the latest tutorials!