




Quick Steps
- Try Appearance > Customize and look for a Footer section.
- No luck? Try Appearance > Widgets and look for a footer text widget.
- Still no luck? Look for your theme’s Theme Panel or Theme Options and its footer settings.
- Update the text, save or publish, and refresh your site to check it.
Why Keep Your Footer Copyright Text Up to Date
The copyright line at the bottom of your website is easy to forget, but it’s one of the first things you’ll want to update when you set up a site or when a new year starts. The tricky part is that every WordPress theme is a little different, so the setting isn’t always in the same place. That’s why this tutorial covers the different places to look:
- Keep the year current: In the video, each site needs its footer year updated.
- Add your own wording or link: You can add a little bit of text or change a link in the footer.
- Works with different themes: Whether your theme uses the Customizer, a widget or its own theme panel, one of these methods should get you there.
How to Edit Footer Copyright Text in WordPress
Start with Method 1 and work your way down. Which one works depends on your theme. The video was recorded in 2021, so your WordPress admin may look a little different.
Method 1: Use the Customizer
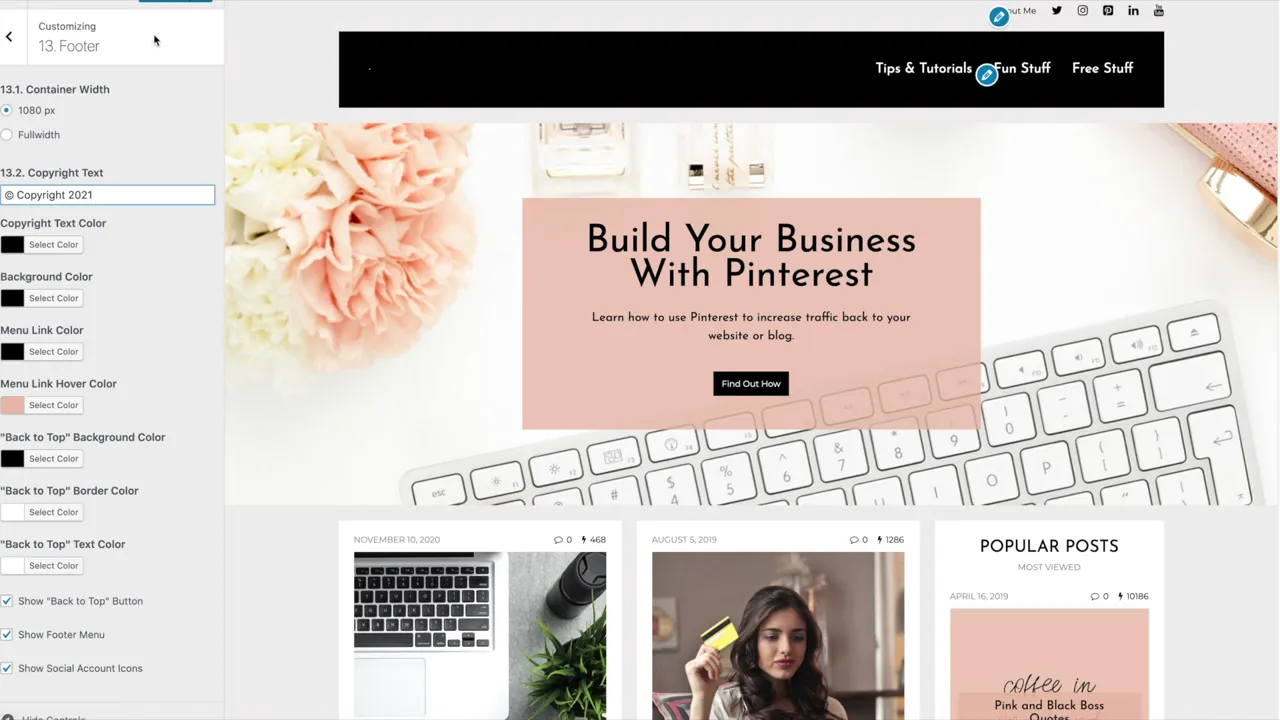
- In your WordPress admin, go to Appearance > Customize.
- Look through the options on the left-hand side for Footer and click on it.
- Find the footer copyright text and update it.
- Click Publish, then refresh your website to see the change.
Method 2: Edit a Footer Widget
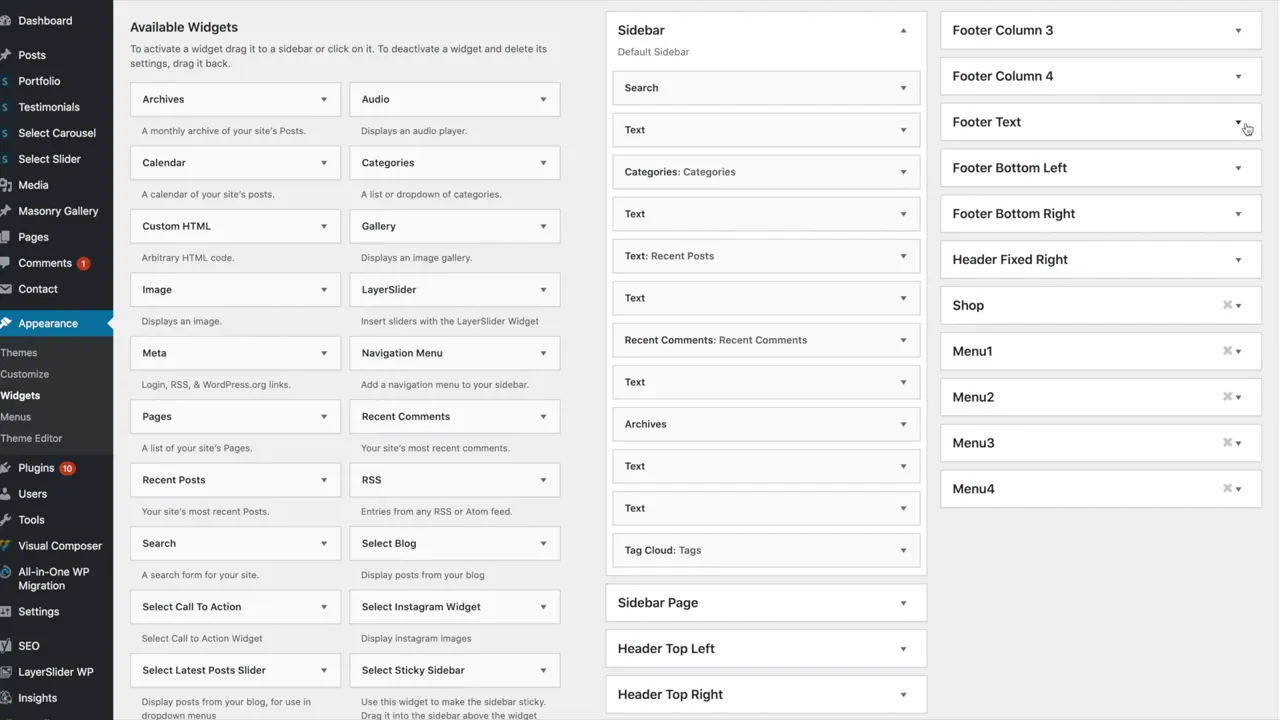
- Go to Appearance > Widgets.
- Scroll through the footer widget areas. In the video’s theme there are several footer columns, then a Footer Text area.
- Expand the footer text widget and update the text.
- Click Save, then refresh your website to check it.
Method 3: Use Your Theme Panel
- Scroll down the left-hand menu of your WordPress admin to your theme’s panel. Sometimes it’s called Theme Panel and sometimes Theme Options. You can usually reach it from the top navigation of your WordPress admin, too.
- Click on Footer Settings. By default you may see style settings, like how many columns, colors and fonts.
- Click on Footer Bottom Bar (the name may be different in your theme) and update the footer text.
- Click Save Changes, then refresh your website.
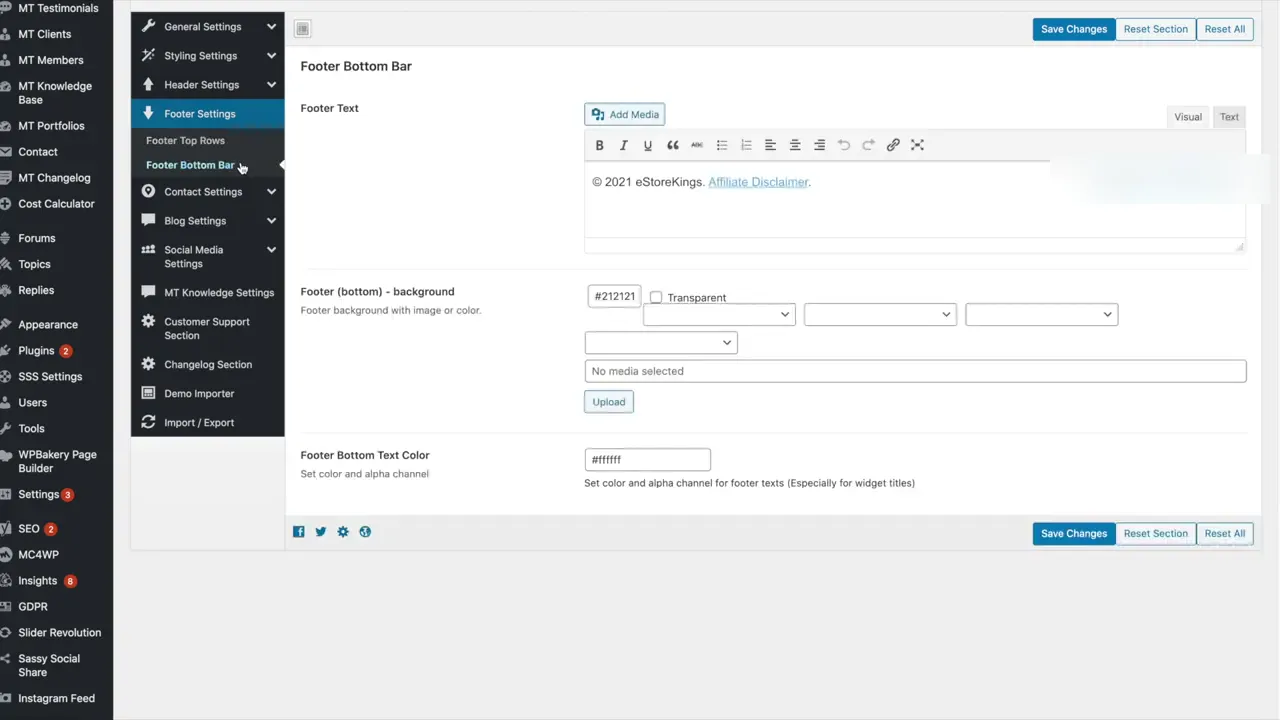
The setup and options you see here will vary from theme to theme.
Method 4: Edit the Theme’s Footer File
Depending on your theme, you may not see any of the options above. In that case, the video shows a fourth way: changing the text in your theme’s code, in the footer file under Appearance > Theme Editor. Because this means editing theme code, follow that part of the video (from 4:32) step by step if you choose to try it.
Want to learn more ways to customize your site? Browse our WordPress Tutorials.
Frequently Asked Questions
It depends on your theme. Check Appearance > Customize for a Footer section first, then Appearance > Widgets for a footer text widget, then your theme’s Theme Panel or Theme Options.
Every WordPress theme is different. Your theme may keep the footer text in a widget or in its own theme panel instead.
After you publish or save, go to your website and refresh the page. Scroll to the bottom to see the new text.
For more tutorials, visit our WordPress Tutorials page or subscribe to our YouTube channel. You can also signup for our email newsletter below for free resources and the latest tutorials!