



Quick Steps
- Go to Posts > Add New and add your title and text.
- Turn your headers into heading blocks and bold the key points.
- Add links, images and a YouTube video, then preview the post.
- In the Post settings, set visibility, publish date, URL slug, categories, tags and a featured image.
- Click Publish.
Why Take the Time to Format Your Blog Post
Pasting your text into WordPress is only the start. A few extra minutes of formatting makes your post easier for your readers to take in. Best of all, you can do all of it with what WordPress comes with, no page builder or extra plugins needed. Here’s what each piece does for you:
- Headings: Headings organize your post into clear sections and help break up the text for your reader.
- Bold text: Bolding the most important parts helps your reader take in the information.
- Links that open in a new tab: When you link to another website, opening it in a new tab keeps your own site open, so visitors stay longer.
- Images and videos: They give your readers more context and they’re visually appealing.
- Tags: Tags help organize your content and can power related posts that lead readers to another post.
- Featured image: In most themes it shows at the top of your post, and it’s the image that gets pulled when your post is shared on social media.
How to Create and Publish a Blog Post in WordPress
The video was recorded in 2022 on WordPress 5.9 with the built-in block editor, so a few buttons may look a little different on your screen.
Step 1: Start a New Post
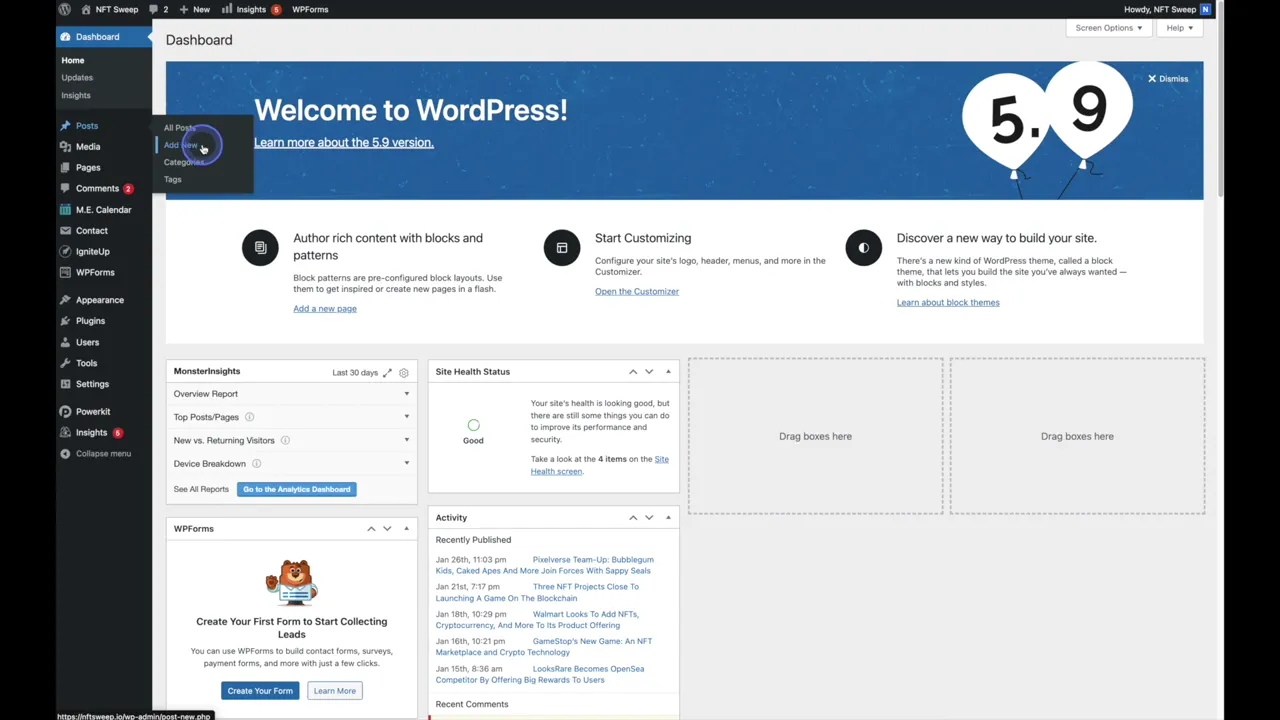
Once you’re logged into WordPress, you’ll land on the dashboard. Hover over Posts in the left-hand menu and click on Add New.
Step 2: Add Your Title and Text
Type or paste your title into the title area, then paste your body text below it. If your post is already written somewhere else, copy and paste works great.
Step 3: Turn Your Headers into Headings
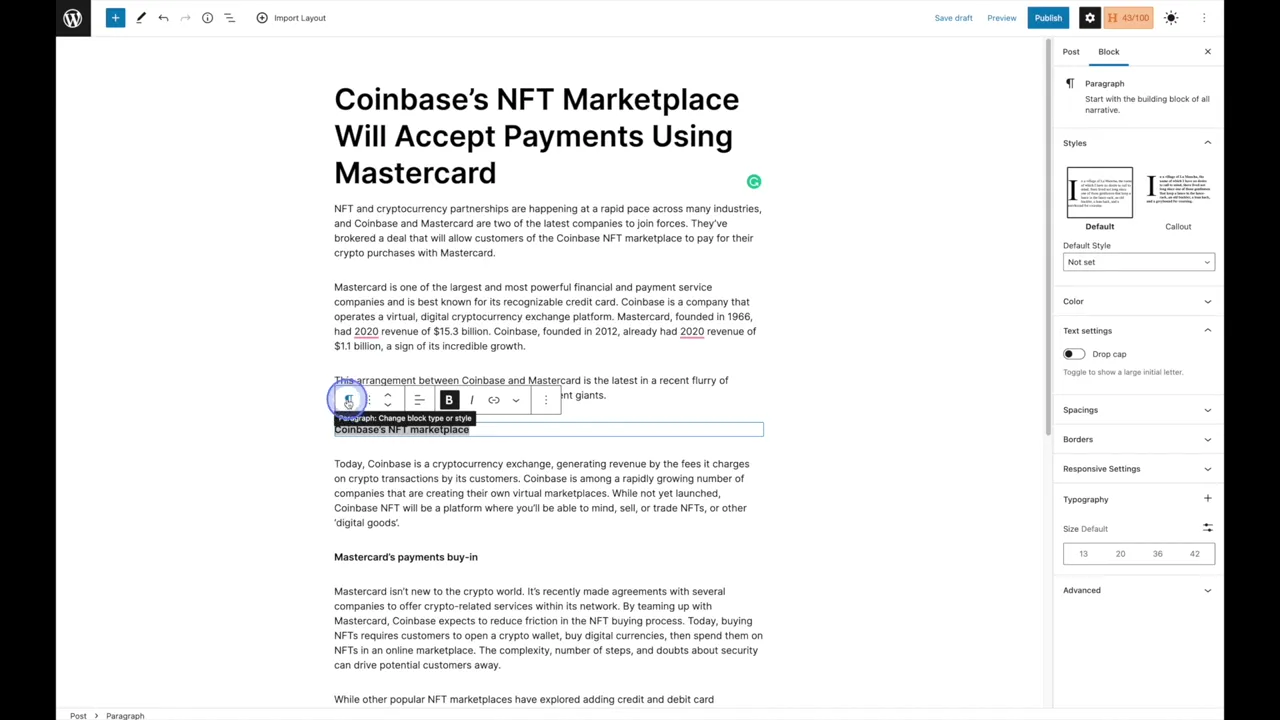
Pasted headers often come in as bold paragraph text. To turn one into a real heading, click on it, click the paragraph icon in the block toolbar and select Heading. Do the same for the rest of your headers.
Step 4: Bold the Important Parts
Highlight the most important parts of your text and click Bold, or use the shortcut Command + B on a Mac or Control + B on Windows. Keep an eye out for any corrections as you go.
Step 5: Add Links
- Copy the URL of the page you want to link to.
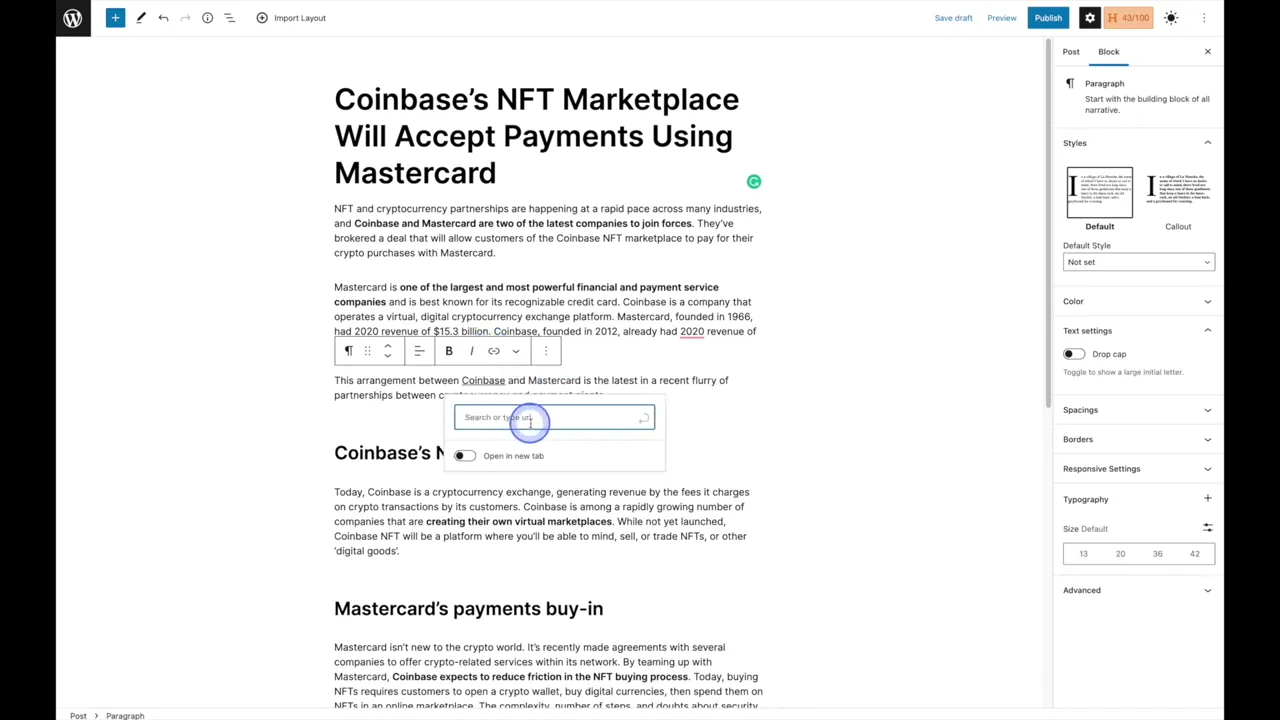
- Highlight the text you’d like to link and click the link button (or use Command + K or Control + K).
- Paste the URL.
- If the link goes to a website that isn’t yours, toggle on Open in new tab.
- Click on the URL below the field to add the link.
Want every external link to open in a new tab automatically? See our WordPress External Links plugin tutorial.
Step 6: Preview Your Post
Click Preview in the top right corner. You can preview as though you’re on different devices, or choose Preview in new tab. Click your links to make sure they work.
Step 7: Add an Image
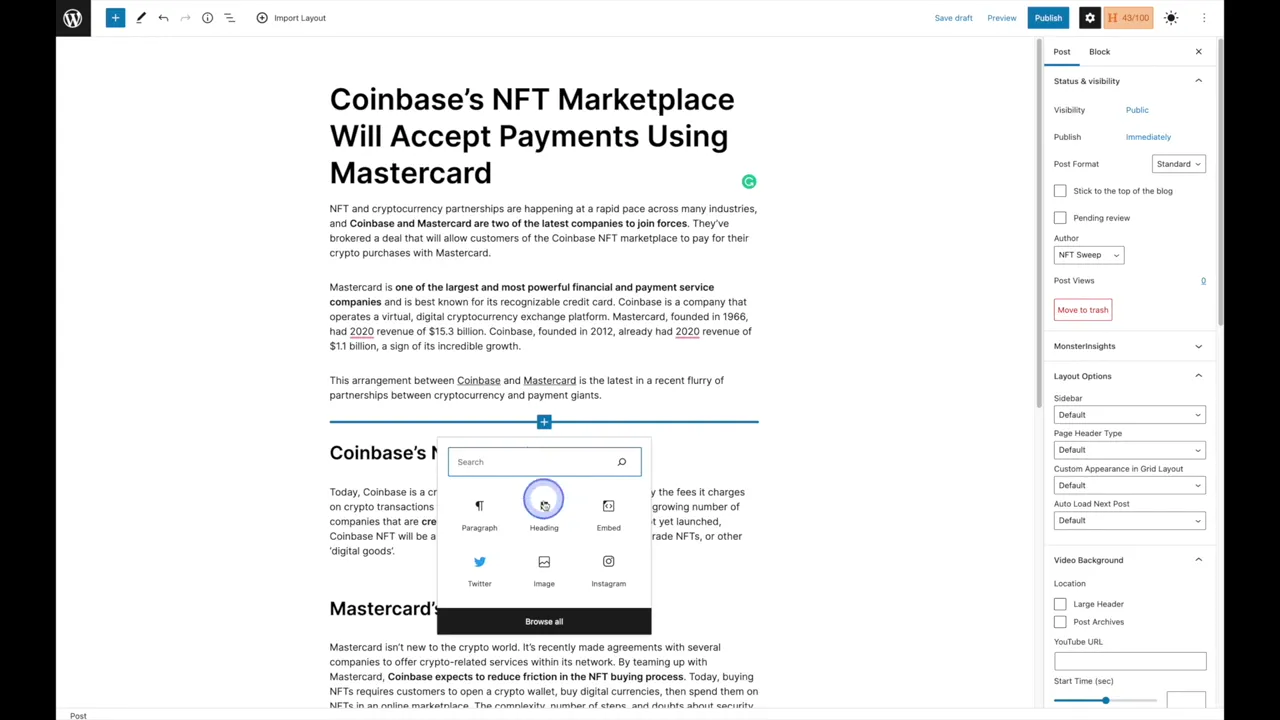
- Hover over the body of your post until you see a plus sign that says Add block, then click it.
- Choose Image.
- Upload an image from your computer, choose one from your Media Library, or Insert from URL. For a brand new post, you’ll usually upload.
- Add a caption if you’d like.
You can link an image too: click on the image, click the insert link icon, paste the link and click Apply.
Step 8: Embed a YouTube Video
Adding a YouTube video is very easy. Click the plus sign to add a paragraph block, then paste the video URL into it. WordPress does the hard work and embeds the video for you, and it can be played right inside your post. Add a caption if you’d like.
Step 9: Choose Your Post Settings
Click on the Post tab in the top right corner to open the post settings.
- Visibility: Keep it Public so everyone can see it. The other options are Private and Password protected.
- Publish: Leave it on Immediately, backdate it, or schedule it to go live on a day and time in the future.
- Author: Change it if someone else on your team wrote the post.
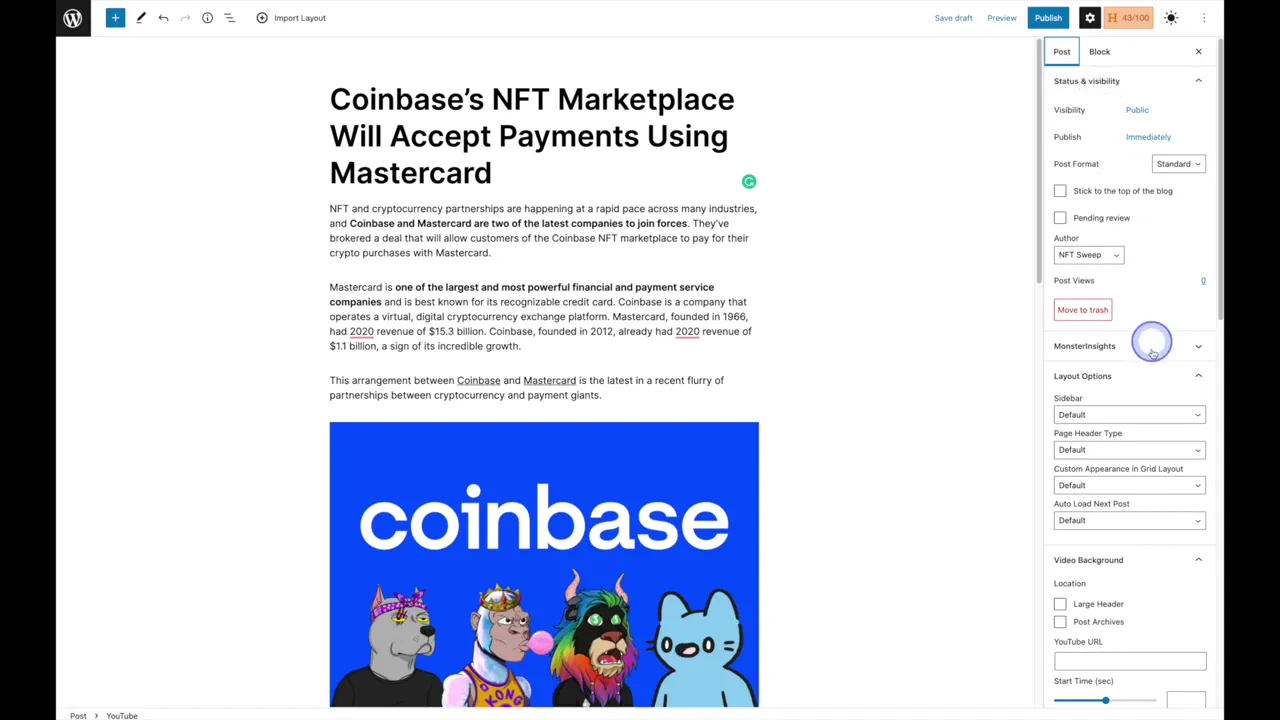
Some settings in the sidebar come from your theme, so you may not see all of the same options.
Step 10: Set the URL Slug, Categories and Tags
- URL slug: If your permalinks are set to post name, WordPress builds the URL from your title. You can edit it, for example to make it shorter.
- Categories: Tick the categories that fit, or click Add New Category, type a name and add it.
- Tags: Start typing a tag. Tags you’ve used before will pop up so you can click them. For a new tag, press comma or Enter.
Step 11: Add a Featured Image
- Click Set featured image.
- Choose an image you’ve already uploaded, or go to Upload files, click Select Files and pick an image from your computer.
- Add some alt text to describe the image. Using your keywords here can also help with SEO.
- Click Set featured image.
Step 12: Publish Your Post
Preview your post one last time and read it over. If you scheduled a date earlier just to try it out, set it back to now. When you’re happy, click the blue Publish button. Visit your website and your new post will be there, just like your readers will see it.
Frequently Asked Questions
No. Everything in this tutorial uses the block editor that comes with WordPress.
Yes. In the Post settings, click the Publish date and choose a day and time in the future. You can also backdate a post.
Paste the video URL into a paragraph block. WordPress embeds it for you automatically.
In most themes it appears at the top of your post, and it’s the image that gets pulled when someone shares your post on social media.
For more tutorials, visit our WordPress Tutorials page or subscribe to our YouTube channel. You can also signup for our email newsletter below for free resources and the latest tutorials!