




Quick Steps
- Go to Slider Revolution and click the edit icon on your slider.
- Click Add Layer > Shape.
- Under Position & Size, set Size Presets to Cover and Layer Align to Scene.
- Drag the shape below your text in the layers panel.
- Adjust BG Color and transparency under Style, then click Save.
Why Add an Overlay Behind Your Slider Text
Slider Revolution is one of the most popular slider plugins you can use in WordPress, and it’s the one we use on our own site. The animations are nice and smooth and it looks very modern. But depending on your font color and the images you use, the text on your slides can be hard to read. A black semi-transparent layer behind the text fixes that and makes your words pop. Here’s why it’s worth the couple of minutes:
- Easier to read: White text no longer gets lost on a bright image.
- Helps everything on top of the slider: In the video, the overlay also made the menu across the top and the social media icons easier to see.
- Fully adjustable: You can make it lighter or darker, or change the color altogether.
- Quick to reuse: Copy the shape from one slide and paste it onto the next, settings and all.
How to Add an Overlay in Slider Revolution
You’ll need the Slider Revolution plugin installed with at least one slider already built. The labels below match the version shown in the 2024 video.
Step 1: Open Your Slider
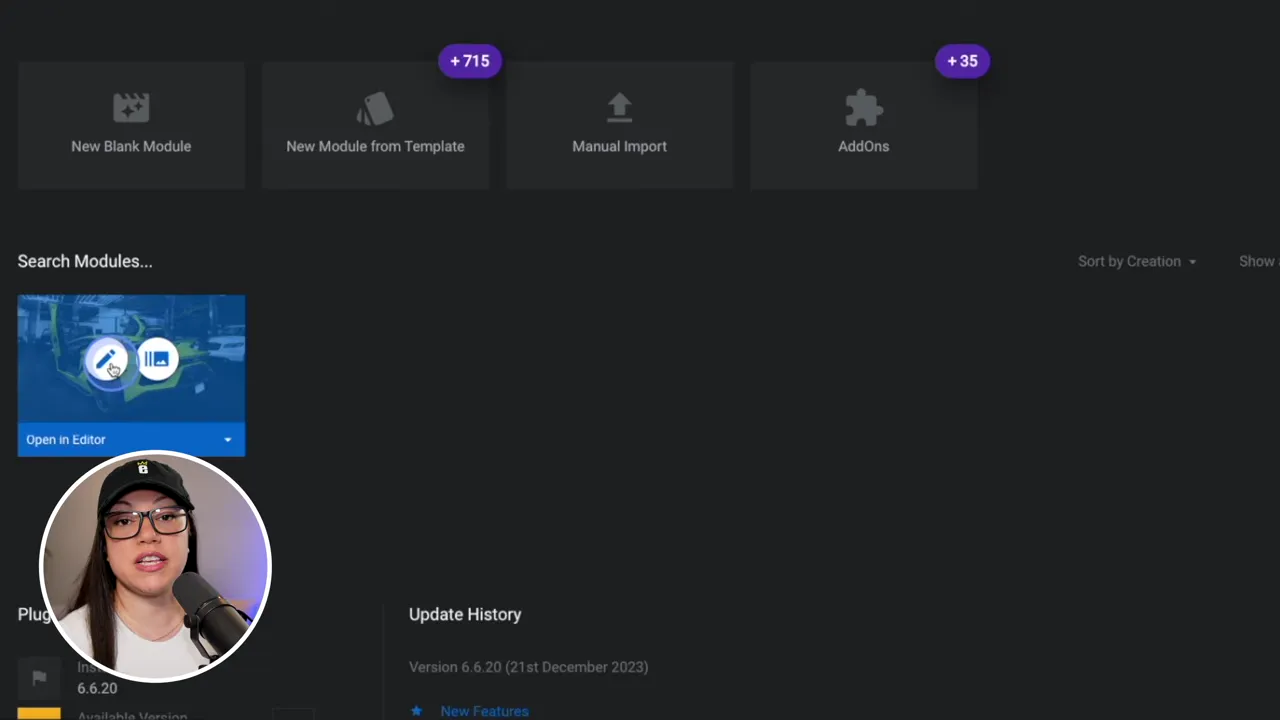
- Once you’re logged into WordPress, click on Slider Revolution in the left-hand menu.
- Under Search Modules, you’ll see a list of all of your sliders.
- Click the edit icon on the slider you want to change. It opens on the first slide.
Step 2: Add a Shape Layer
Click Add Layer at the top and select Shape. This adds a shape that is already semi-transparent. You could drag its corners to resize it, but that gets tedious, and there’s an easier way.
Step 3: Make the Shape Cover the Whole Slide
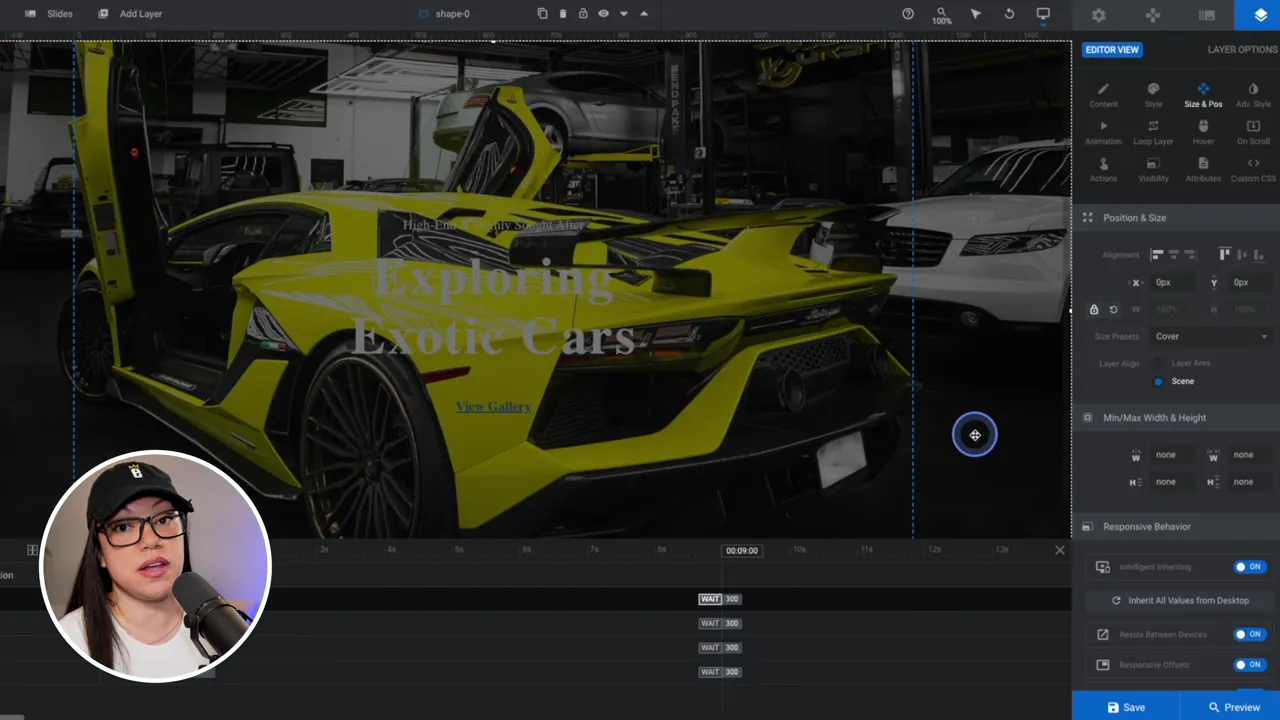
- With the shape selected, go to Position & Size on the right-hand side of the screen.
- About halfway down, open the Size Presets dropdown and select Cover. This only covers part of the slider, so there’s one more setting.
- Next to Layer Align, select Scene. Now the shape covers the entire slider.
Step 4: Move the Shape Behind Your Text
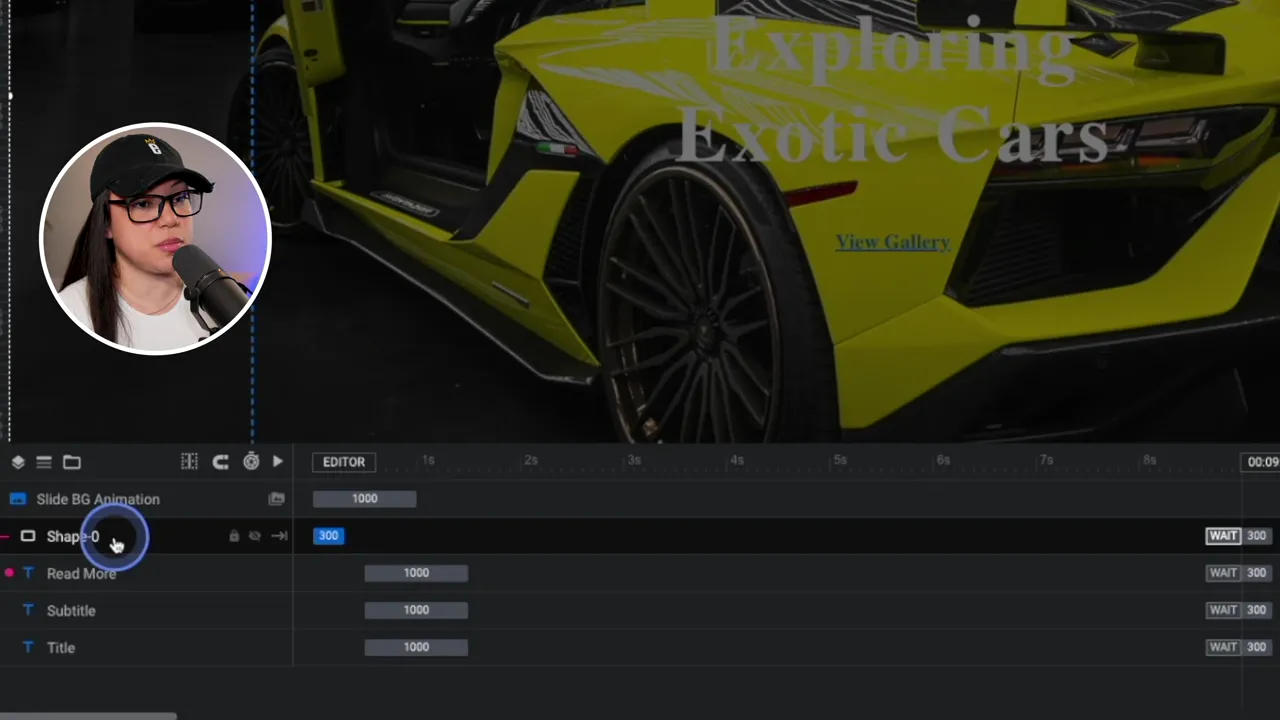
Right now the shape sits on top of your text. Head down to the layers at the bottom of the screen and drag the shape layer down below your text layers. Your text is now on top of the dark overlay and much easier to read.
Step 5: Adjust the Color and Transparency
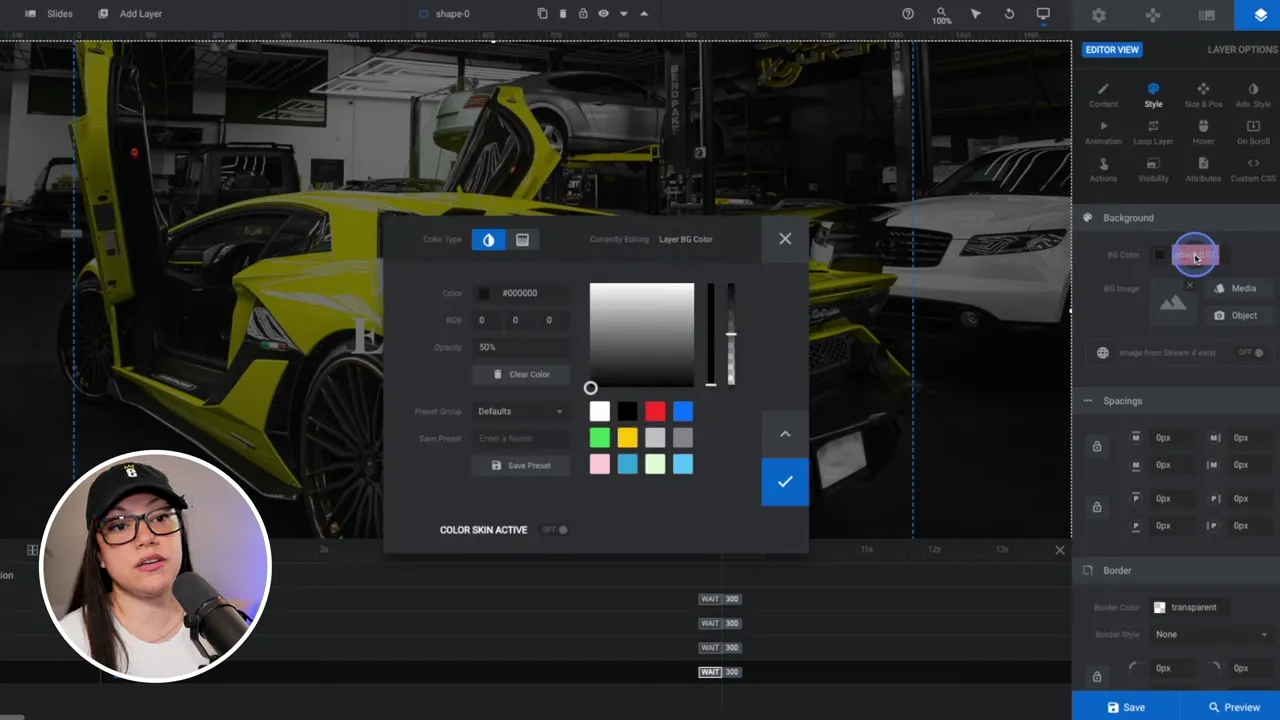
If the overlay looks too light or too dark, go to Style and click on BG Color. From there you can play with the transparency. You can also change the color altogether, for example to give your slide a red tint.
Step 6: Save and Check Your Slider
- Click Save in the bottom right corner.
- You can click Preview to look at the slider, but it won’t show things like the menu across the top of your site.
- For the full picture, go to your website and refresh the page.
Step 7: Copy the Overlay to Your Other Slides
So far only the first slide has the overlay. Instead of starting from scratch on each slide:
- Make sure the shape layer is selected, then click Copy at the top.
- Hover over Slides and select the next slide.
- Click Paste. The shape and all of its settings are added to this slide.
- Drag the shape layer below the text again, just like in Step 4.
- Click Save and refresh your website to check it one last time.
Looking for more ways to improve your site? Browse our WordPress Tutorials.
Frequently Asked Questions
Select the shape, open the Position and Size panel, set Size Presets to Cover and set Layer Align to Scene.
The shape is above your text in the layers. Drag the shape layer below your text layers at the bottom of the editor.
Yes. Go to Style, click BG Color and pick any color, then adjust the transparency until your text is easy to read.
No. Select the shape, click Copy, switch to the next slide under Slides and click Paste. Then move it behind the text and save.
For more tutorials, visit our WordPress Tutorials page or subscribe to our YouTube channel. You can also signup for our email newsletter below for free resources and the latest tutorials!