


The Benefits of Importing Contacts
Importing contacts to Mailchimp as opposed to adding them one by one is beneficial for your business in more ways than one. For starters, it saves you a considerable amount of time since you’re doing it in bulk. It also leaves little room for human error.
Throughout the importing process, Mailchimp allows you to organize your contacts, add tags, and clean up labels. This can be a great time to tidy up an otherwise disorganized list of contacts.
Lastly, by importing contacts from other channels such as a Shopify store or in-store promotion, you can keep all contacts in one place. These contacts aren’t any good for your email marketing efforts if they’re sitting in a file somewhere else.
Cross importing contacts to Mailchimp off your to-do list by following the tutorial below where we cover two different methods: how to upload contacts using a .csv file and how to import contacts manually by copying and pasting them into Mailchimp.
How to Import Contacts to Mailchimp
Method One: Upload a .CSV File
If you’re using a tool like Microsoft Excel or Google Sheets, you can save a spreadsheet as a .csv file. You’ll want to do this before beginning the steps below so that you have the file on hand when it’s time to upload.
- In Mailchimp, click on Audience in the left-hand menu.
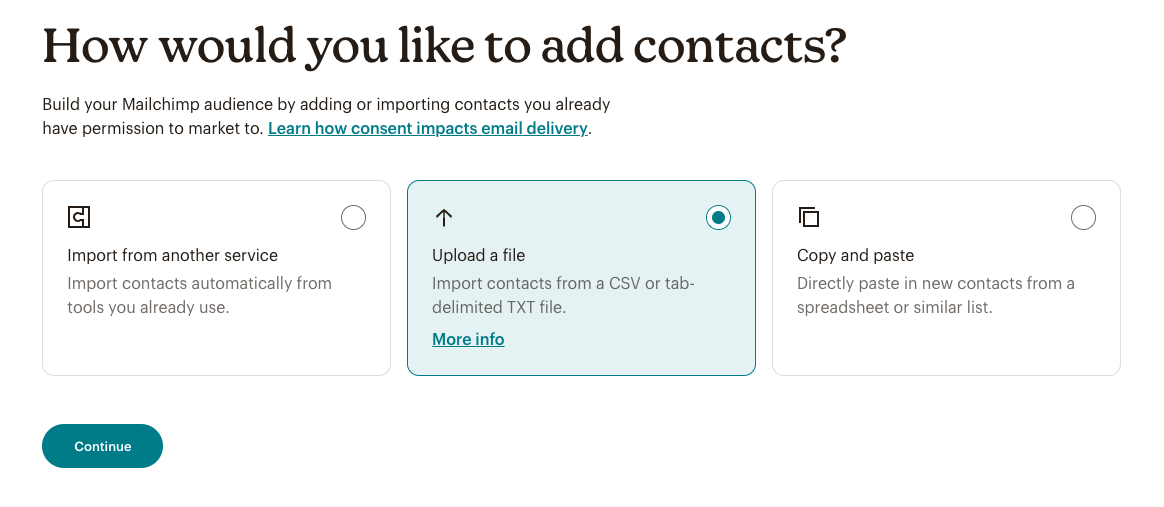
- Click the downward arrow found on the Manage Audience button and select Import Contacts from the dropdown.
- Select Upload a File and click Continue.
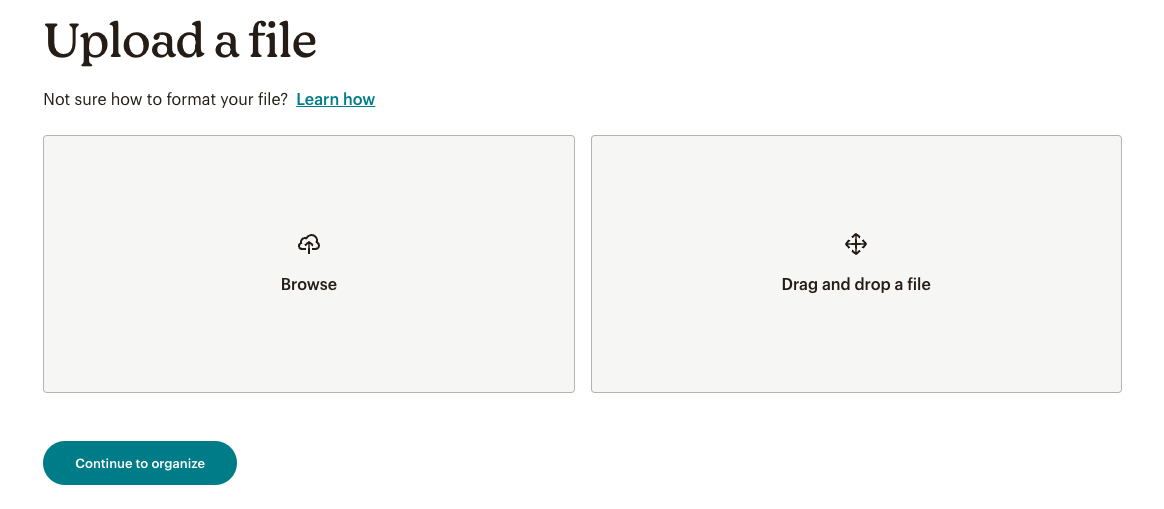
- Browse through the files on your computer and upload your .csv file. You can also drag and drop it into place. Next, click on Continue to Organize.
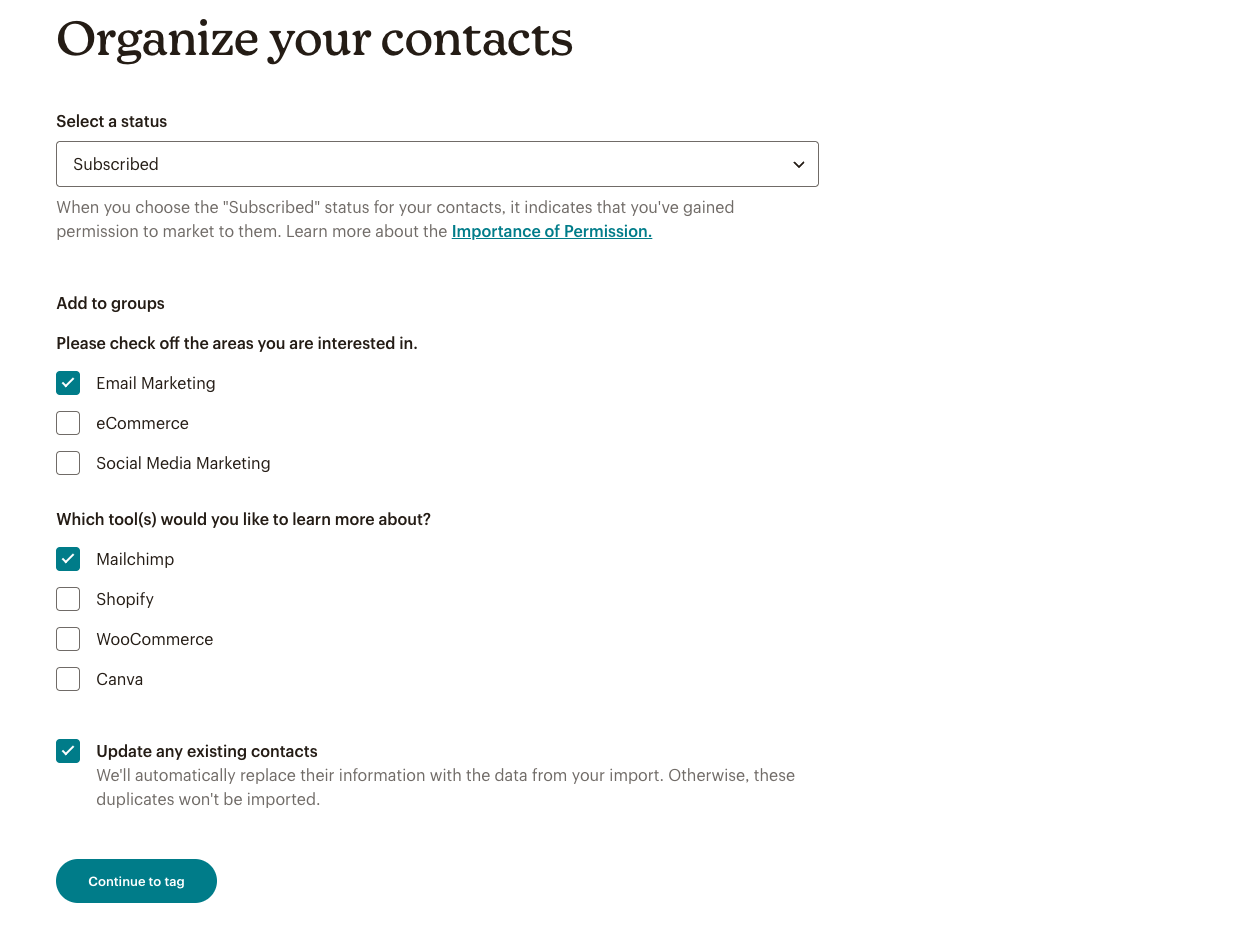
- On the Organize Your Contacts page, select a Status from the dropdown menu. In most cases, you will select Subscribed provided the contacts on your list have given you permission to add them to your mailing list.
- Next, if you have any groups outlined in your signup forms, you can select them based on your subscribers’ interests. In our case, we will add subscribers to the Email Marketing and Mailchimp groups. By adding contacts to groups, you can send them targeted emails knowing which subjects they are interested in.
- If you’d like to overwrite any existing contacts with the new info found in your spreadsheet, check off the Update Any Existing Contacts box. Once you’re done, hit the Continue to Tag button.
- On the following Tag Your Contacts page, add your desired tags, if any. Tags are useful for organizing your contacts. Then, click Continue to Match.
- Next, you’re going to want to review your column labels to make sure that all of the info matches up with the appropriate label. If you need to make any changes to your labels, click on the pencil/edit icon and choose a label from the dropdown list.
- If you don’t see any labels that make sense, you can create one by clicking on Create a New Field located at the top of the dropdown menu. Then, give it a name in the Create a Field Label field and choose the appropriate option under Select a Data Type. To save your changes, click on the Confirm button.
- Once you’re done matching your labels, click on the Finalize Import button. Review the summary and hit Complete Import so long as everything looks ok. Your contacts have now been added!
Method Two: Copy and Paste
- Click on Audience in the left-hand menu.
- Once on the Audience page, click on the Manage Audience button and select Import Contacts from the dropdown.
- Select Copy and Paste and then click Continue.

- Now, we’ll do exactly as it says – copy the contacts from your spreadsheet and paste them into the large area as seen in the screenshot below. Then, hit Continue to Organize.

- On the Organize Your Contacts page, select a Status from the dropdown menu. If the contacts on your list have given you permission to add them to your mailing list, go ahead and select Subscribed.
- If you have any groups outlined in your signup forms, you can add your contacts to these groups by checking off the appropriate boxes. As you can see below, we have added subscribers to the Email Marketing and Mailchimp groups. This allows us to send email campaigns to these contacts that speak specifically to email marketing and Mailchimp.
- If you’d like to overwrite any existing contacts with the new info found in your most recent spreadsheet, check off the Update Any Existing Contacts box. Then, click on the Continue to Tag button.
- Add any tags if needed and then hit Continue to Match.
- Next, check to see if you need to edit any of your column labels. To make any changes, click on the pencil/edit icon and choose a label from the dropdown list. If you don’t see any labels that make sense, you can create one by clicking on Create a New Field located at the top of the dropdown menu. Then, give it a name in the Create a Field Label field and choose the appropriate selection from the Select a Data Type dropdown list. Hit Confirm to save your changes.
- Once you’re ready, click on the Finalize Import button.
- Review the summary and, if everything looks good, click on the Complete Import button.
And, you’re done. Your contacts have been imported into Mailchimp and are ready to receive your next email campaign!
For more tutorials, check out our Mailchimp Tutorials page and signup for our email newsletter below for free marketing resources and more.